
How to Create and Host a Website for Free Using Claude AI and Cloudflare Pages (2026 Guide)

Creating a professional website no longer requires coding experience or expensive hosting plans. In 2026, you can create and host a website for free using powerful AI tools and modern cloud platforms.
In this step-by-step guide, you’ll learn how to use Claude AI to generate a complete static website and deploy it for free using Cloudflare Pages. Whether you’re building a business website, portfolio, or personal project, this method is fast, beginner-friendly, and cost-free.
By the end of this tutorial, your website will be live and accessible to your customers online.
Step 1: Go to Claude.ai and Create a Free Account
First, go to https://claude.ai and create a free account.
Sign up using your email address and complete the registration process. After that, log in to your account.
Claude AI is one of the best AI tools for generating clean and structured website code.
Step 2: Enter a Website Creation Prompt in Claude
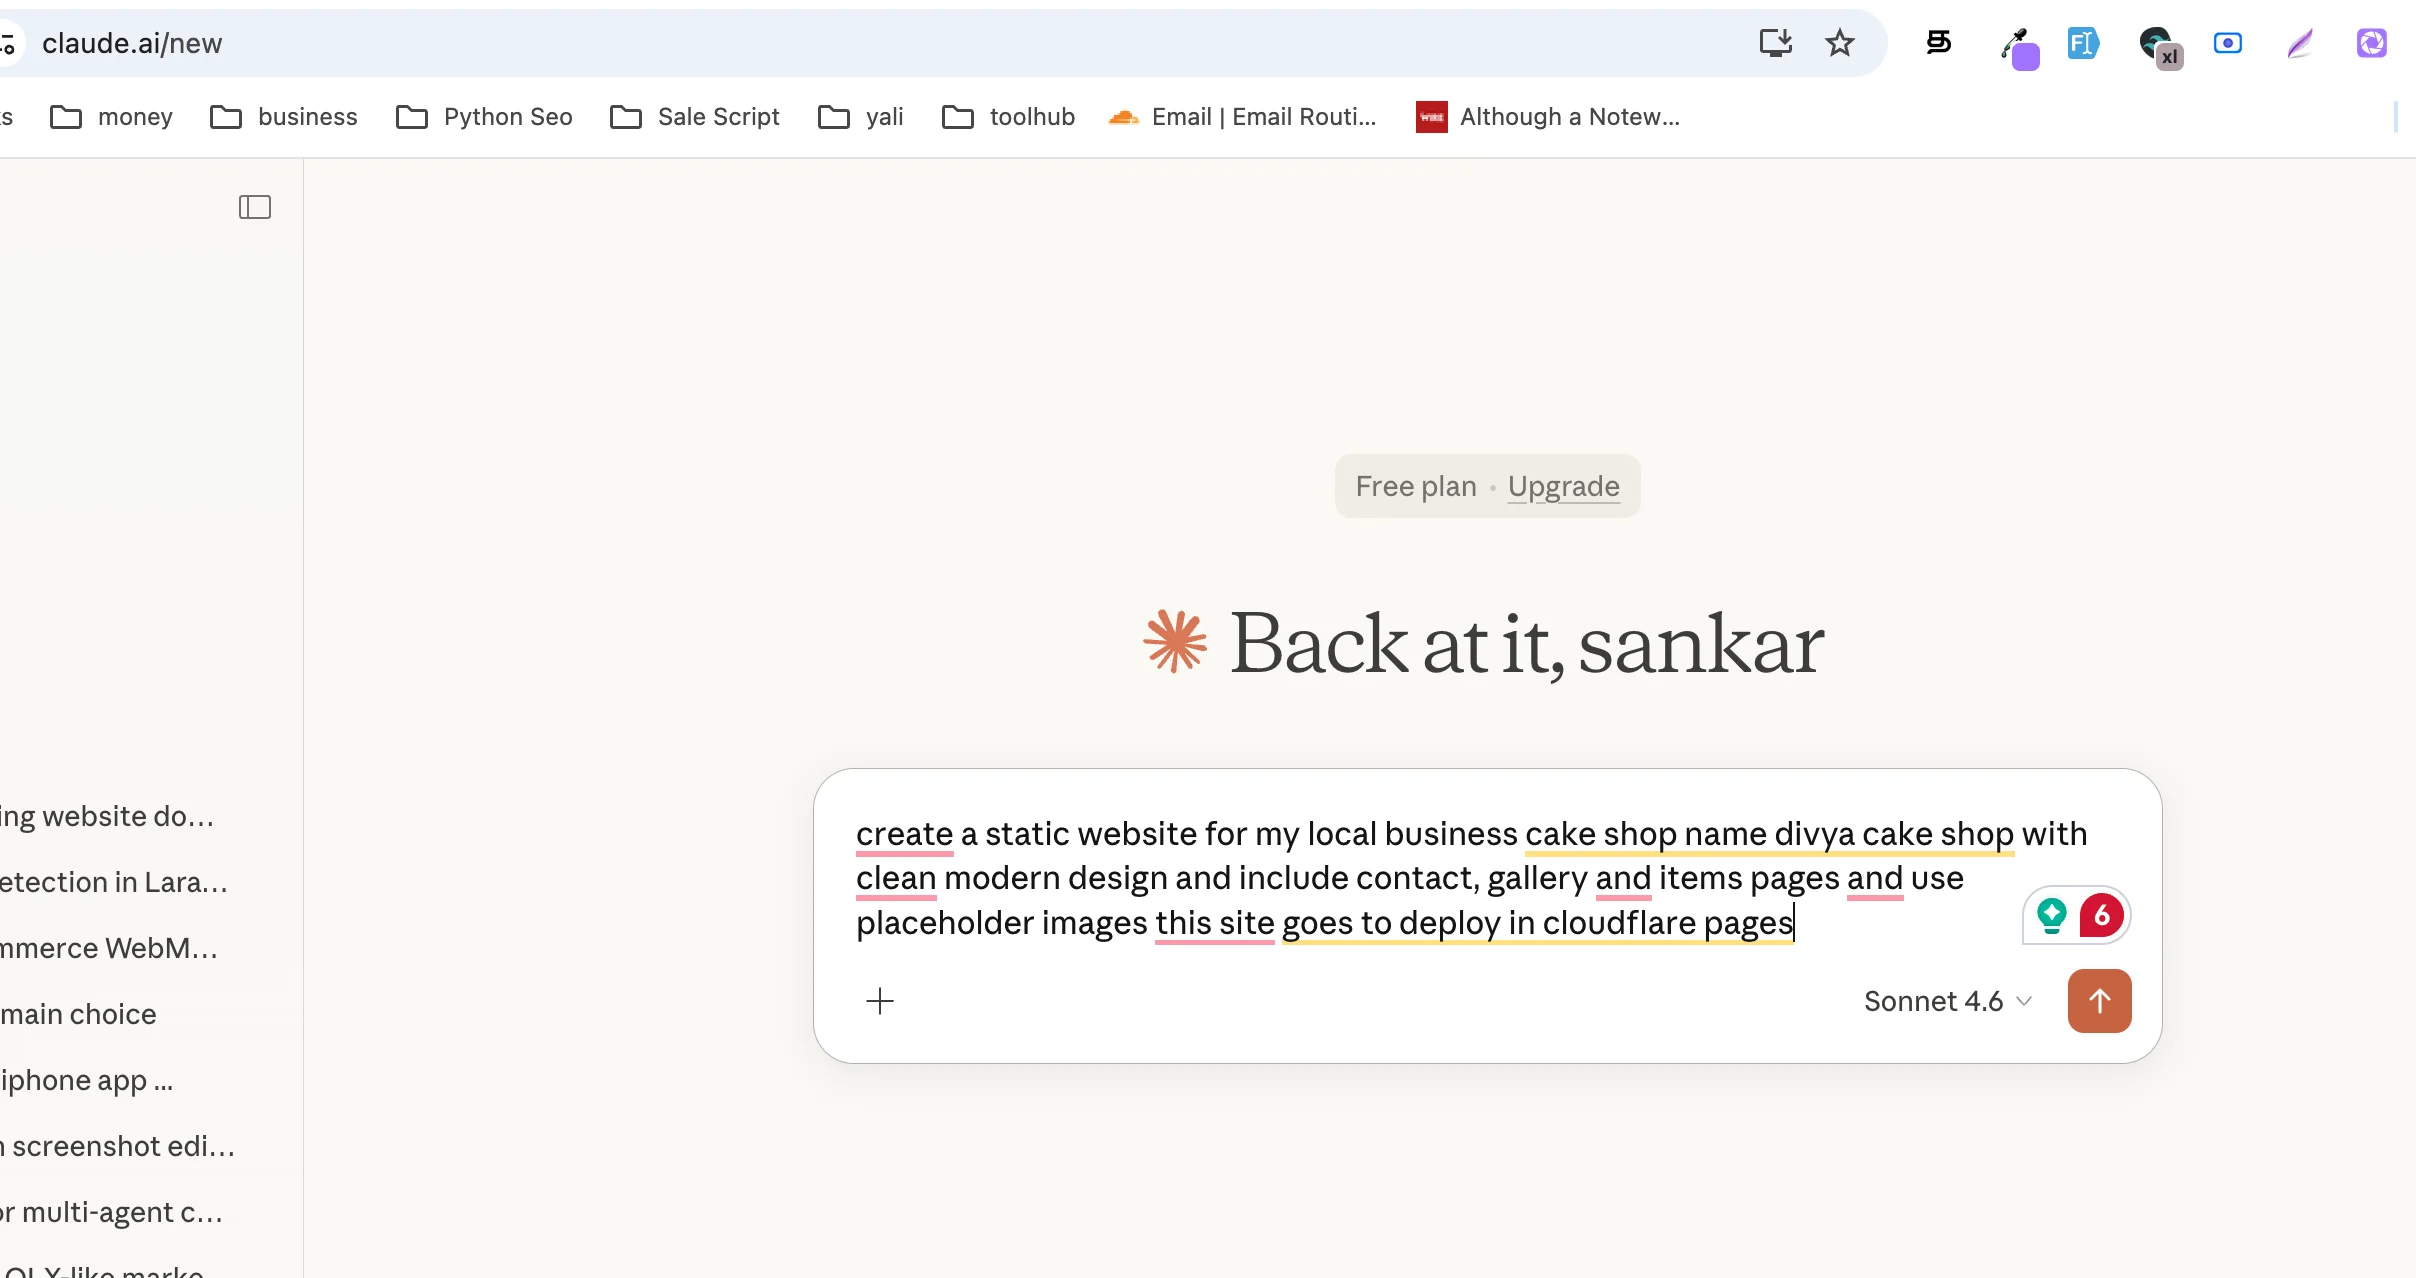
After logging in, you’ll see the Claude chat page.
Enter a simple prompt like the one below and click submit. If you want a complete business website prompt, you can see this generator: https://lovabletools.com/local-business-website-prompt-generator
create a static website for my local business cake shop name divya cake shop with clean modern design and include contact, gallery and items pages and use placeholder images this site goes to deploy in cloudflare pages
This prompt tells Claude to:
- Create a static website
- Use a clean modern design
- Add Contact, Gallery, and Items pages
- Use placeholder images
- Make it ready for Cloudflare Pages deployment
💡 Tip: You can modify the prompt to match your business name, niche, colors, and layout style.
Step 3: Download the Generated Website ZIP File
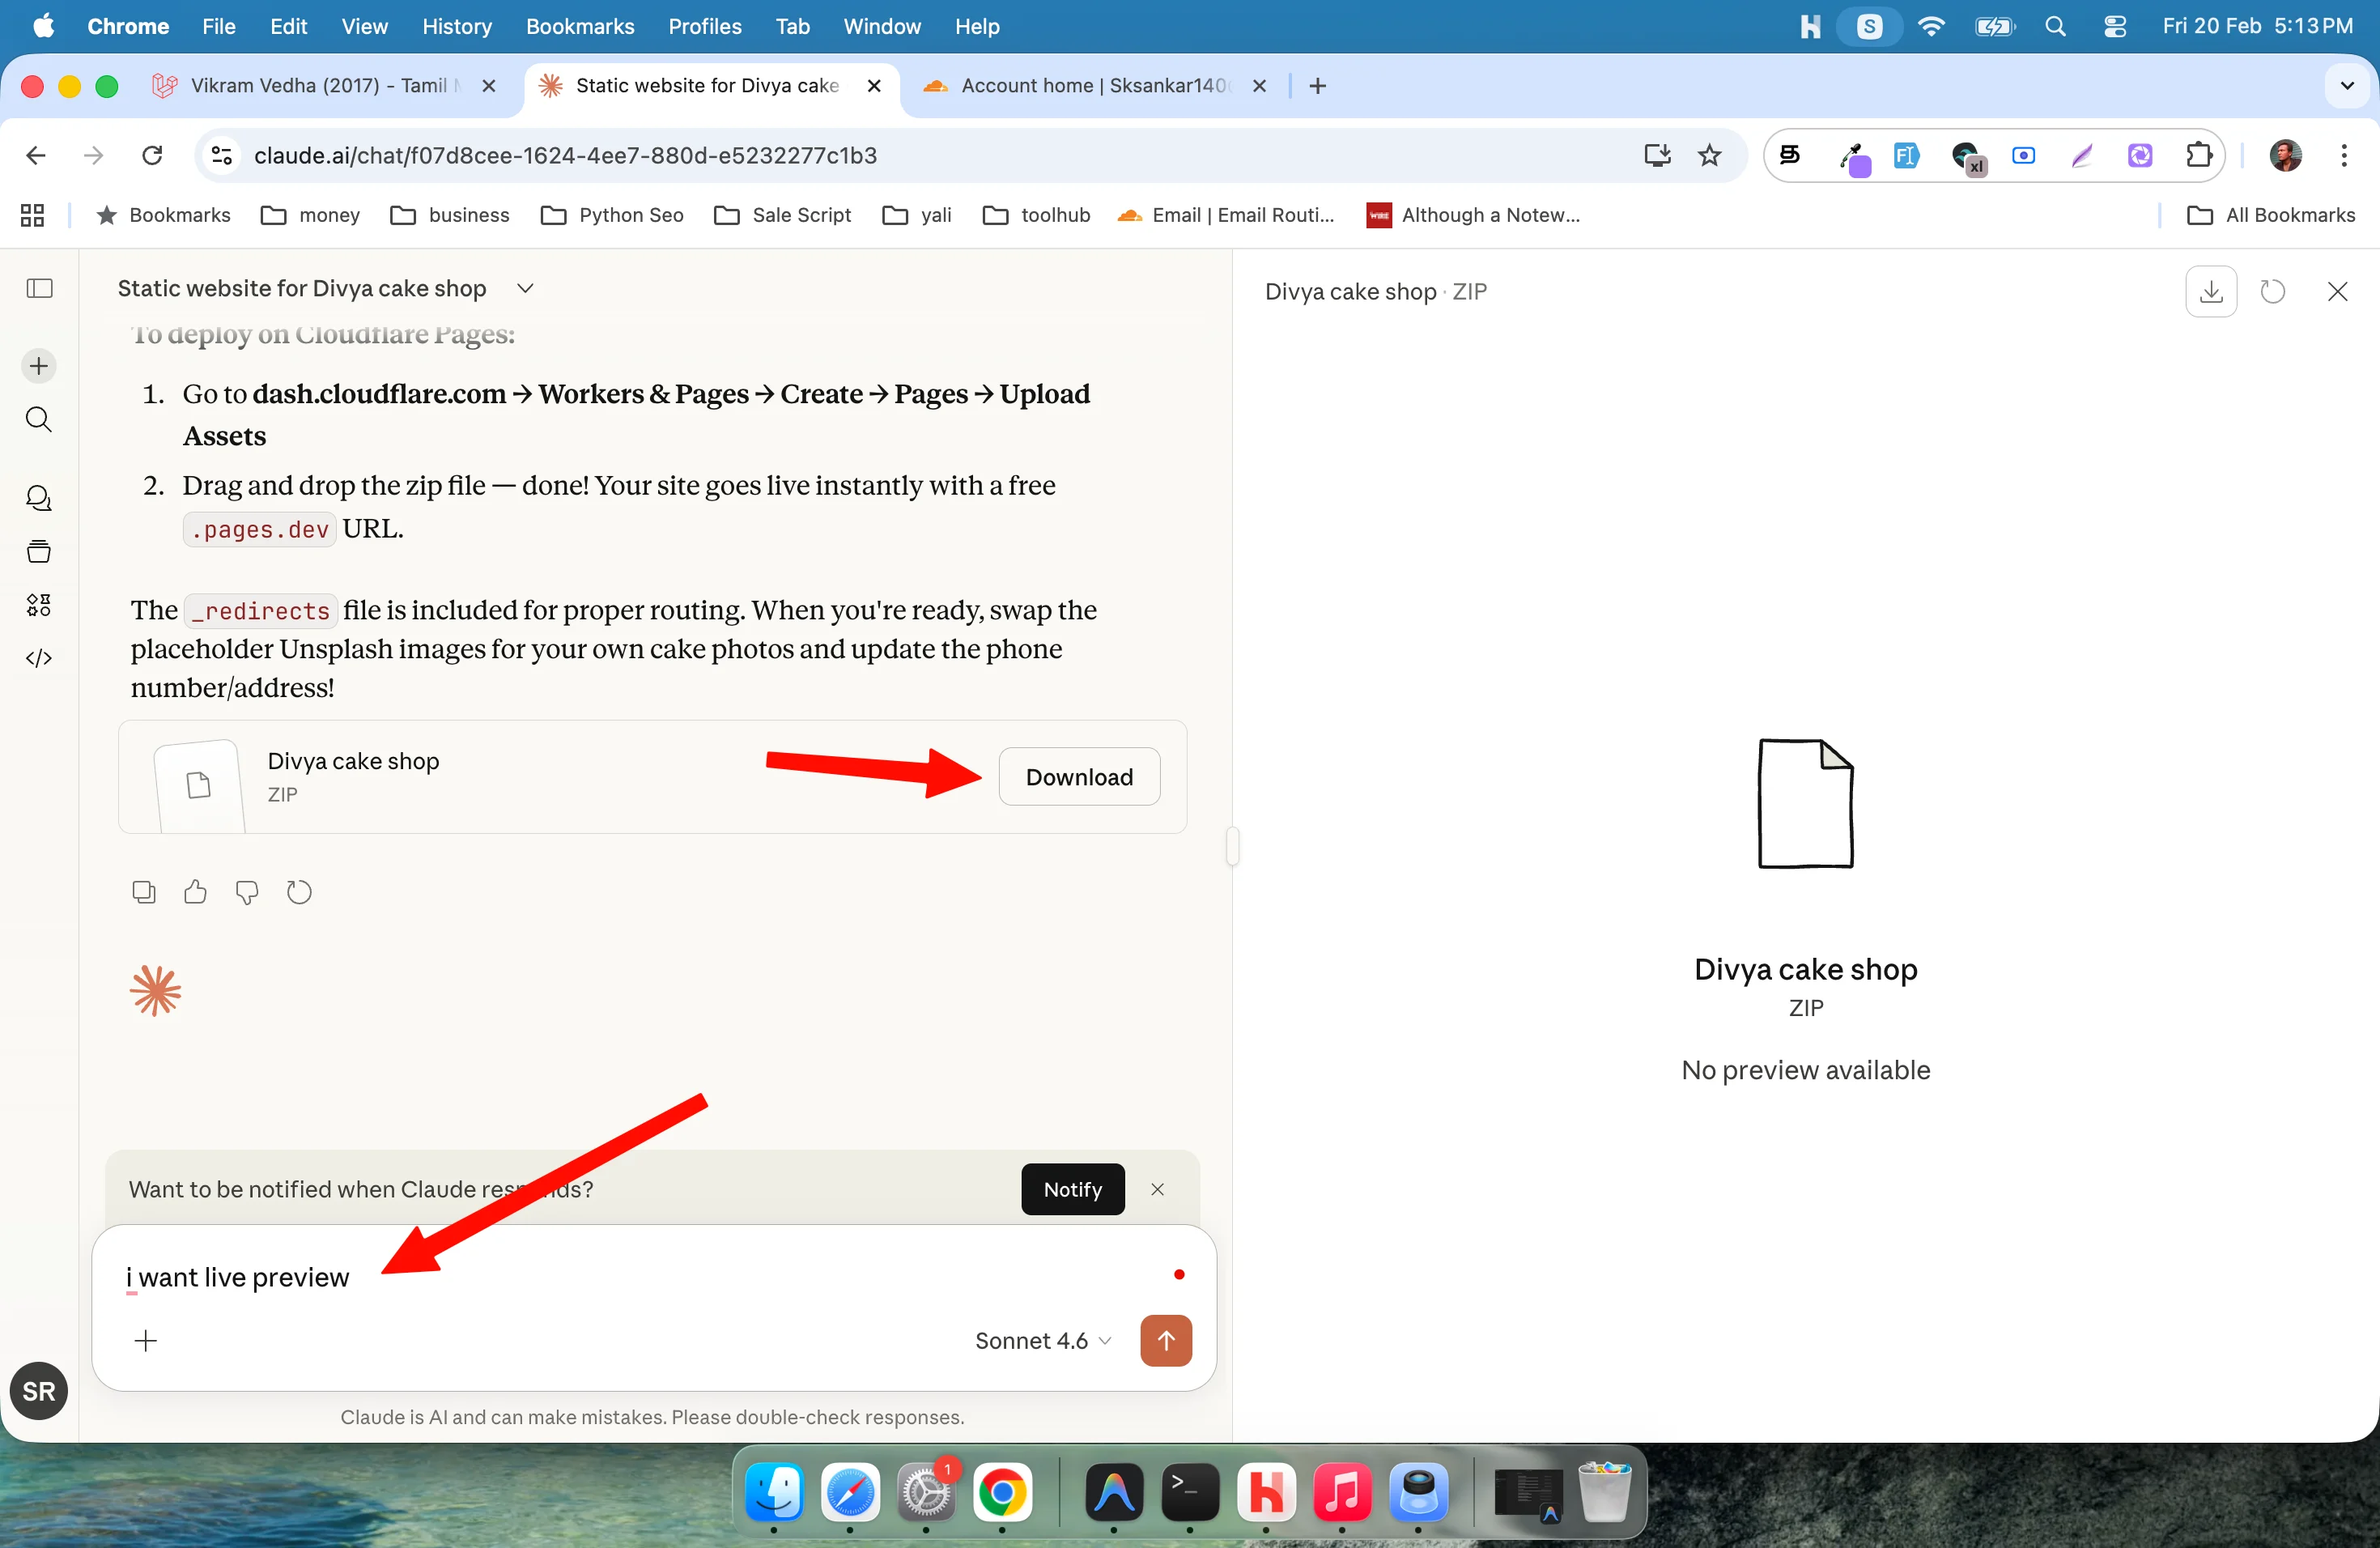
After a few minutes, Claude will generate your complete website and create a ZIP file for download.
You can:
- Preview the code
- Ask Claude to make design changes
- Request additional pages
- Modify content using new prompts
If you want to add your own images, consider converting them to WebP format for better performance. You can use these free tools:
You can also read this blog post about bulk image conversion:
https://lovabletools.com/blog/how-can-you-convert-large-images-to-other-formats-easy-step-by-step-guide
💡 Tip: WebP images load faster and improve website speed, which helps SEO.
Step 4: Go to Cloudflare Dashboard and Create a Free Account
If you’re satisfied with your website design, download the ZIP file.
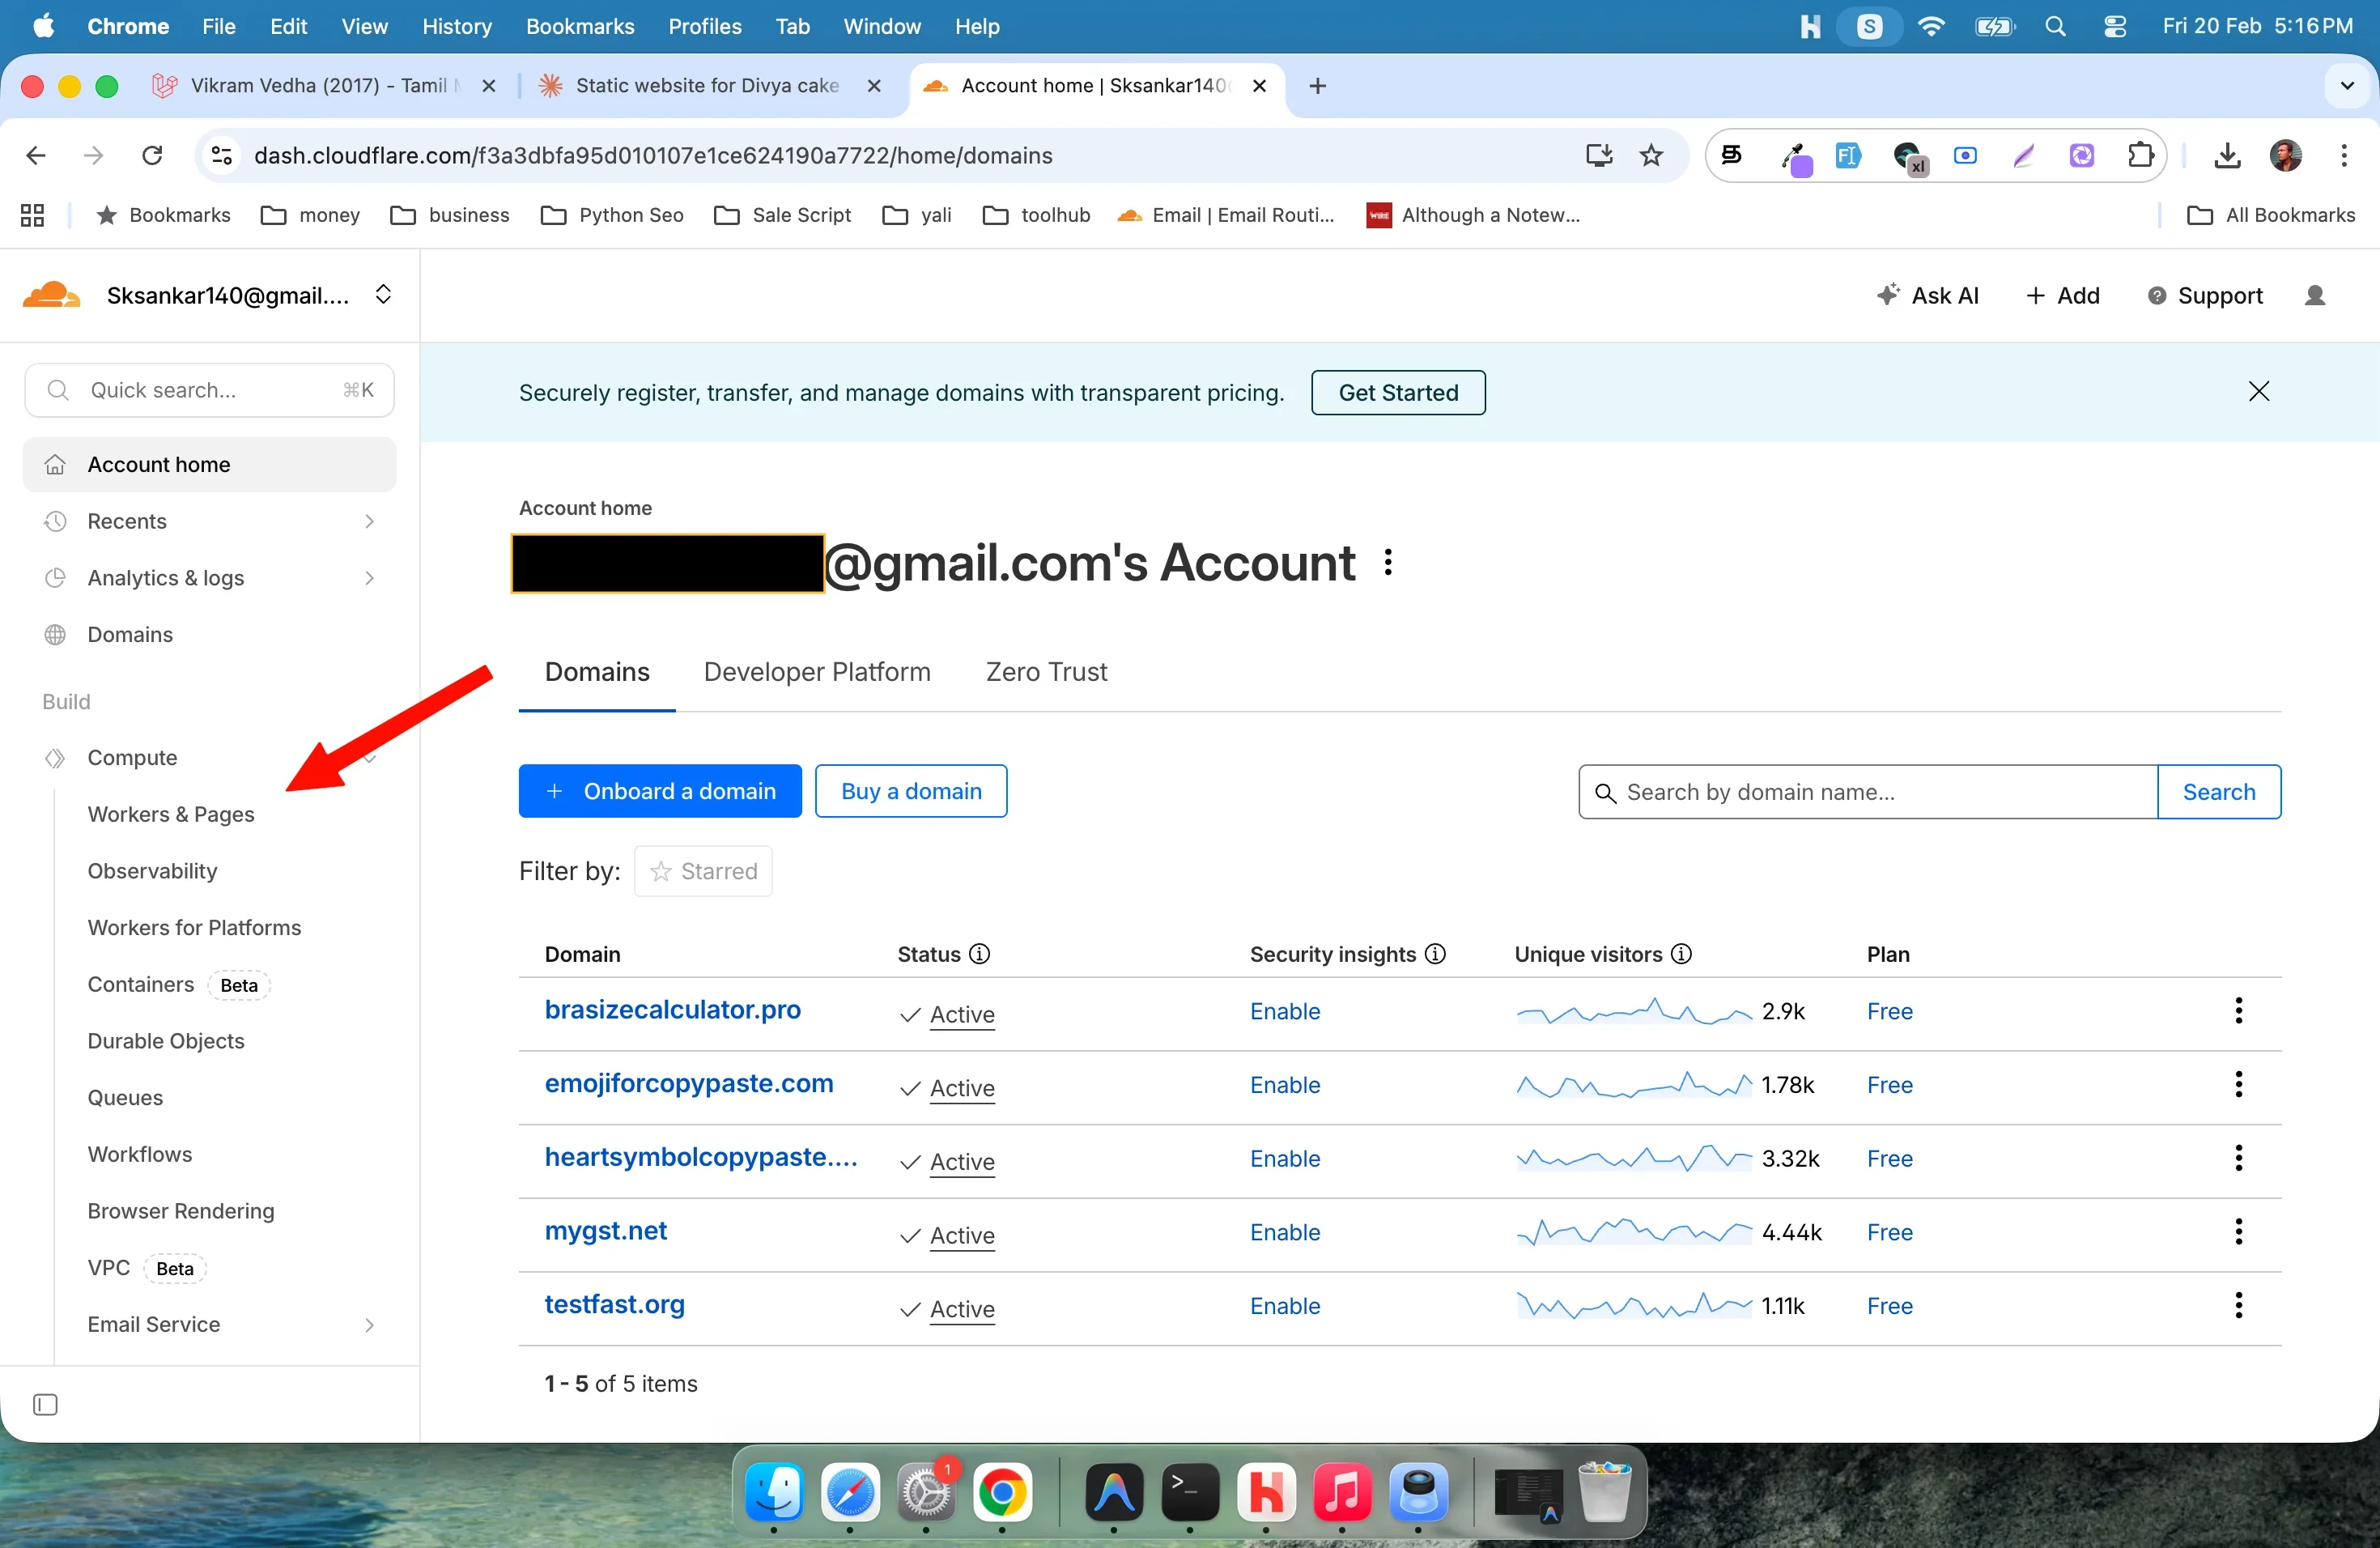
Next, go to https://dash.cloudflare.com, create a free account, and log in.
Then go to the Workers & Pages section in your dashboard.
Step 5: Click “Create Application”
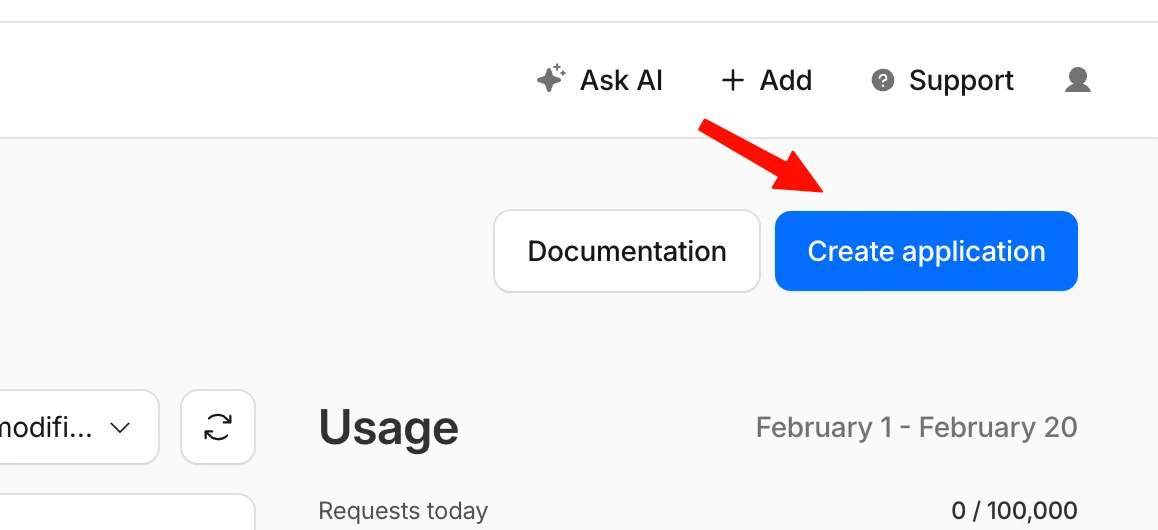
On the Workers & Pages page, click the Create Application button.
This allows you to deploy a new website project.
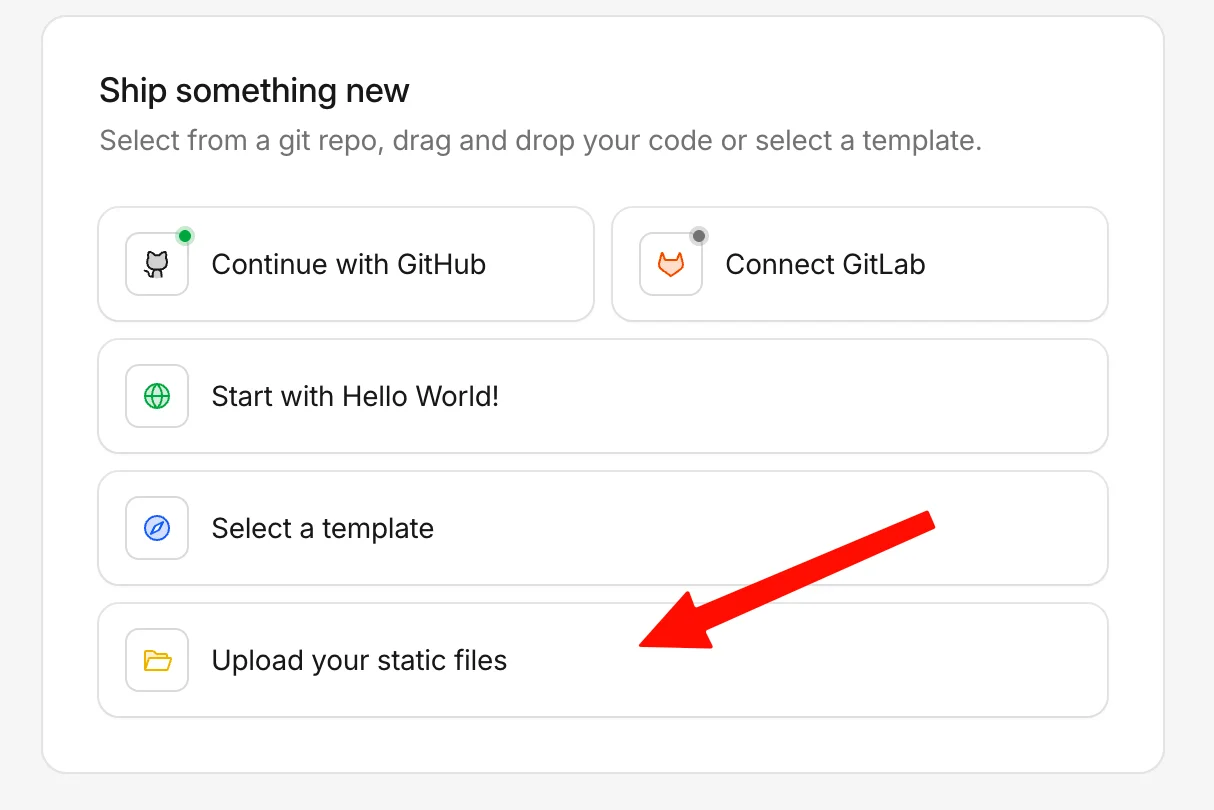
Step 6: Click “Upload Your Static Files”
Next, choose the option Upload your static files.
Since Claude generated a static website, this is the correct deployment method.
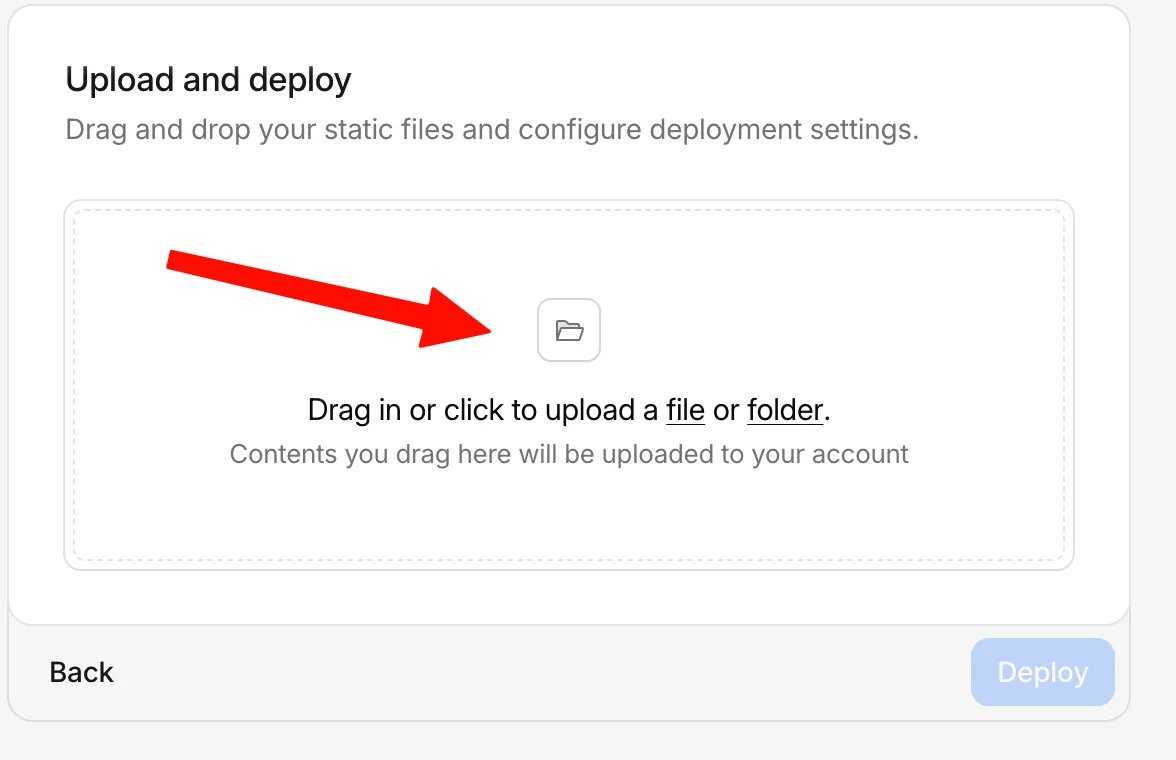
Step 7: Upload Your Website ZIP File
Click the file upload option and select your website ZIP file that you downloaded from Claude.
Cloudflare will begin preparing your project for deployment.
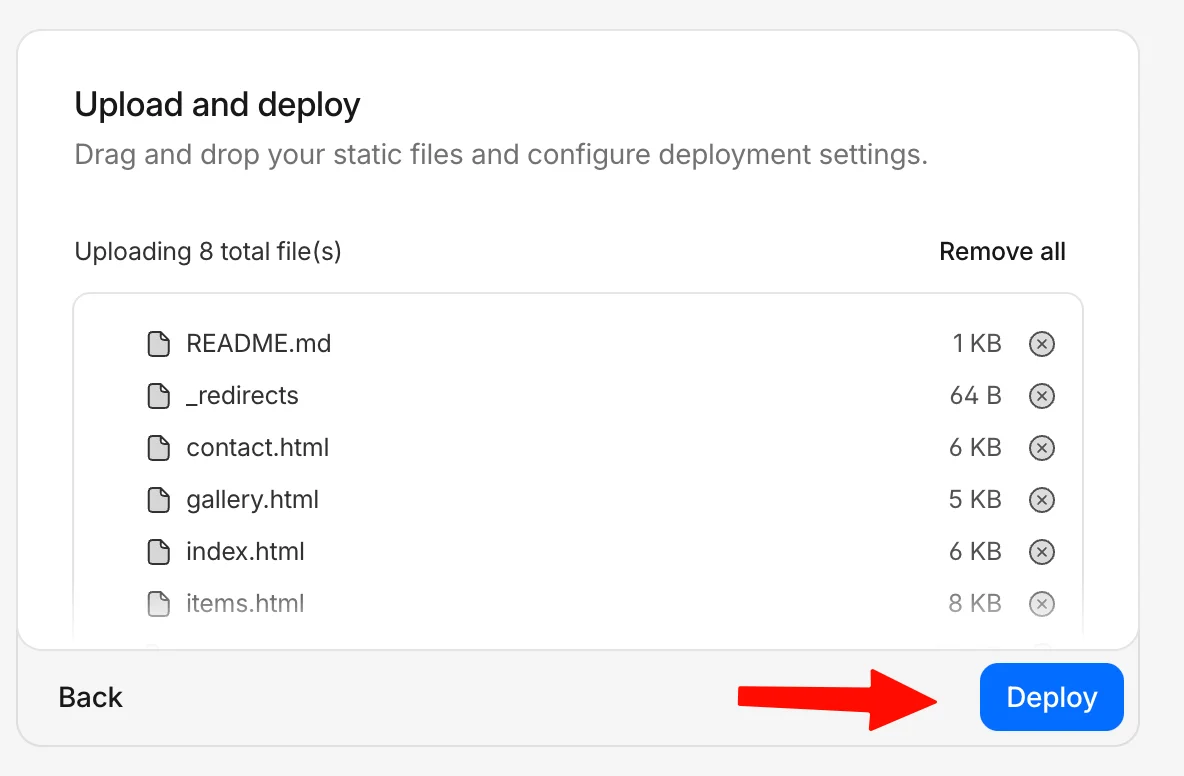
Step 8: Review Files and Click Deploy
On the next screen, Cloudflare will list your website files.
Carefully check for any unwanted files. If something unnecessary exists (like _redirects), remove it.
Once everything looks correct, click Deploy.
💡 Tip: Always double-check file structure to avoid deployment errors.
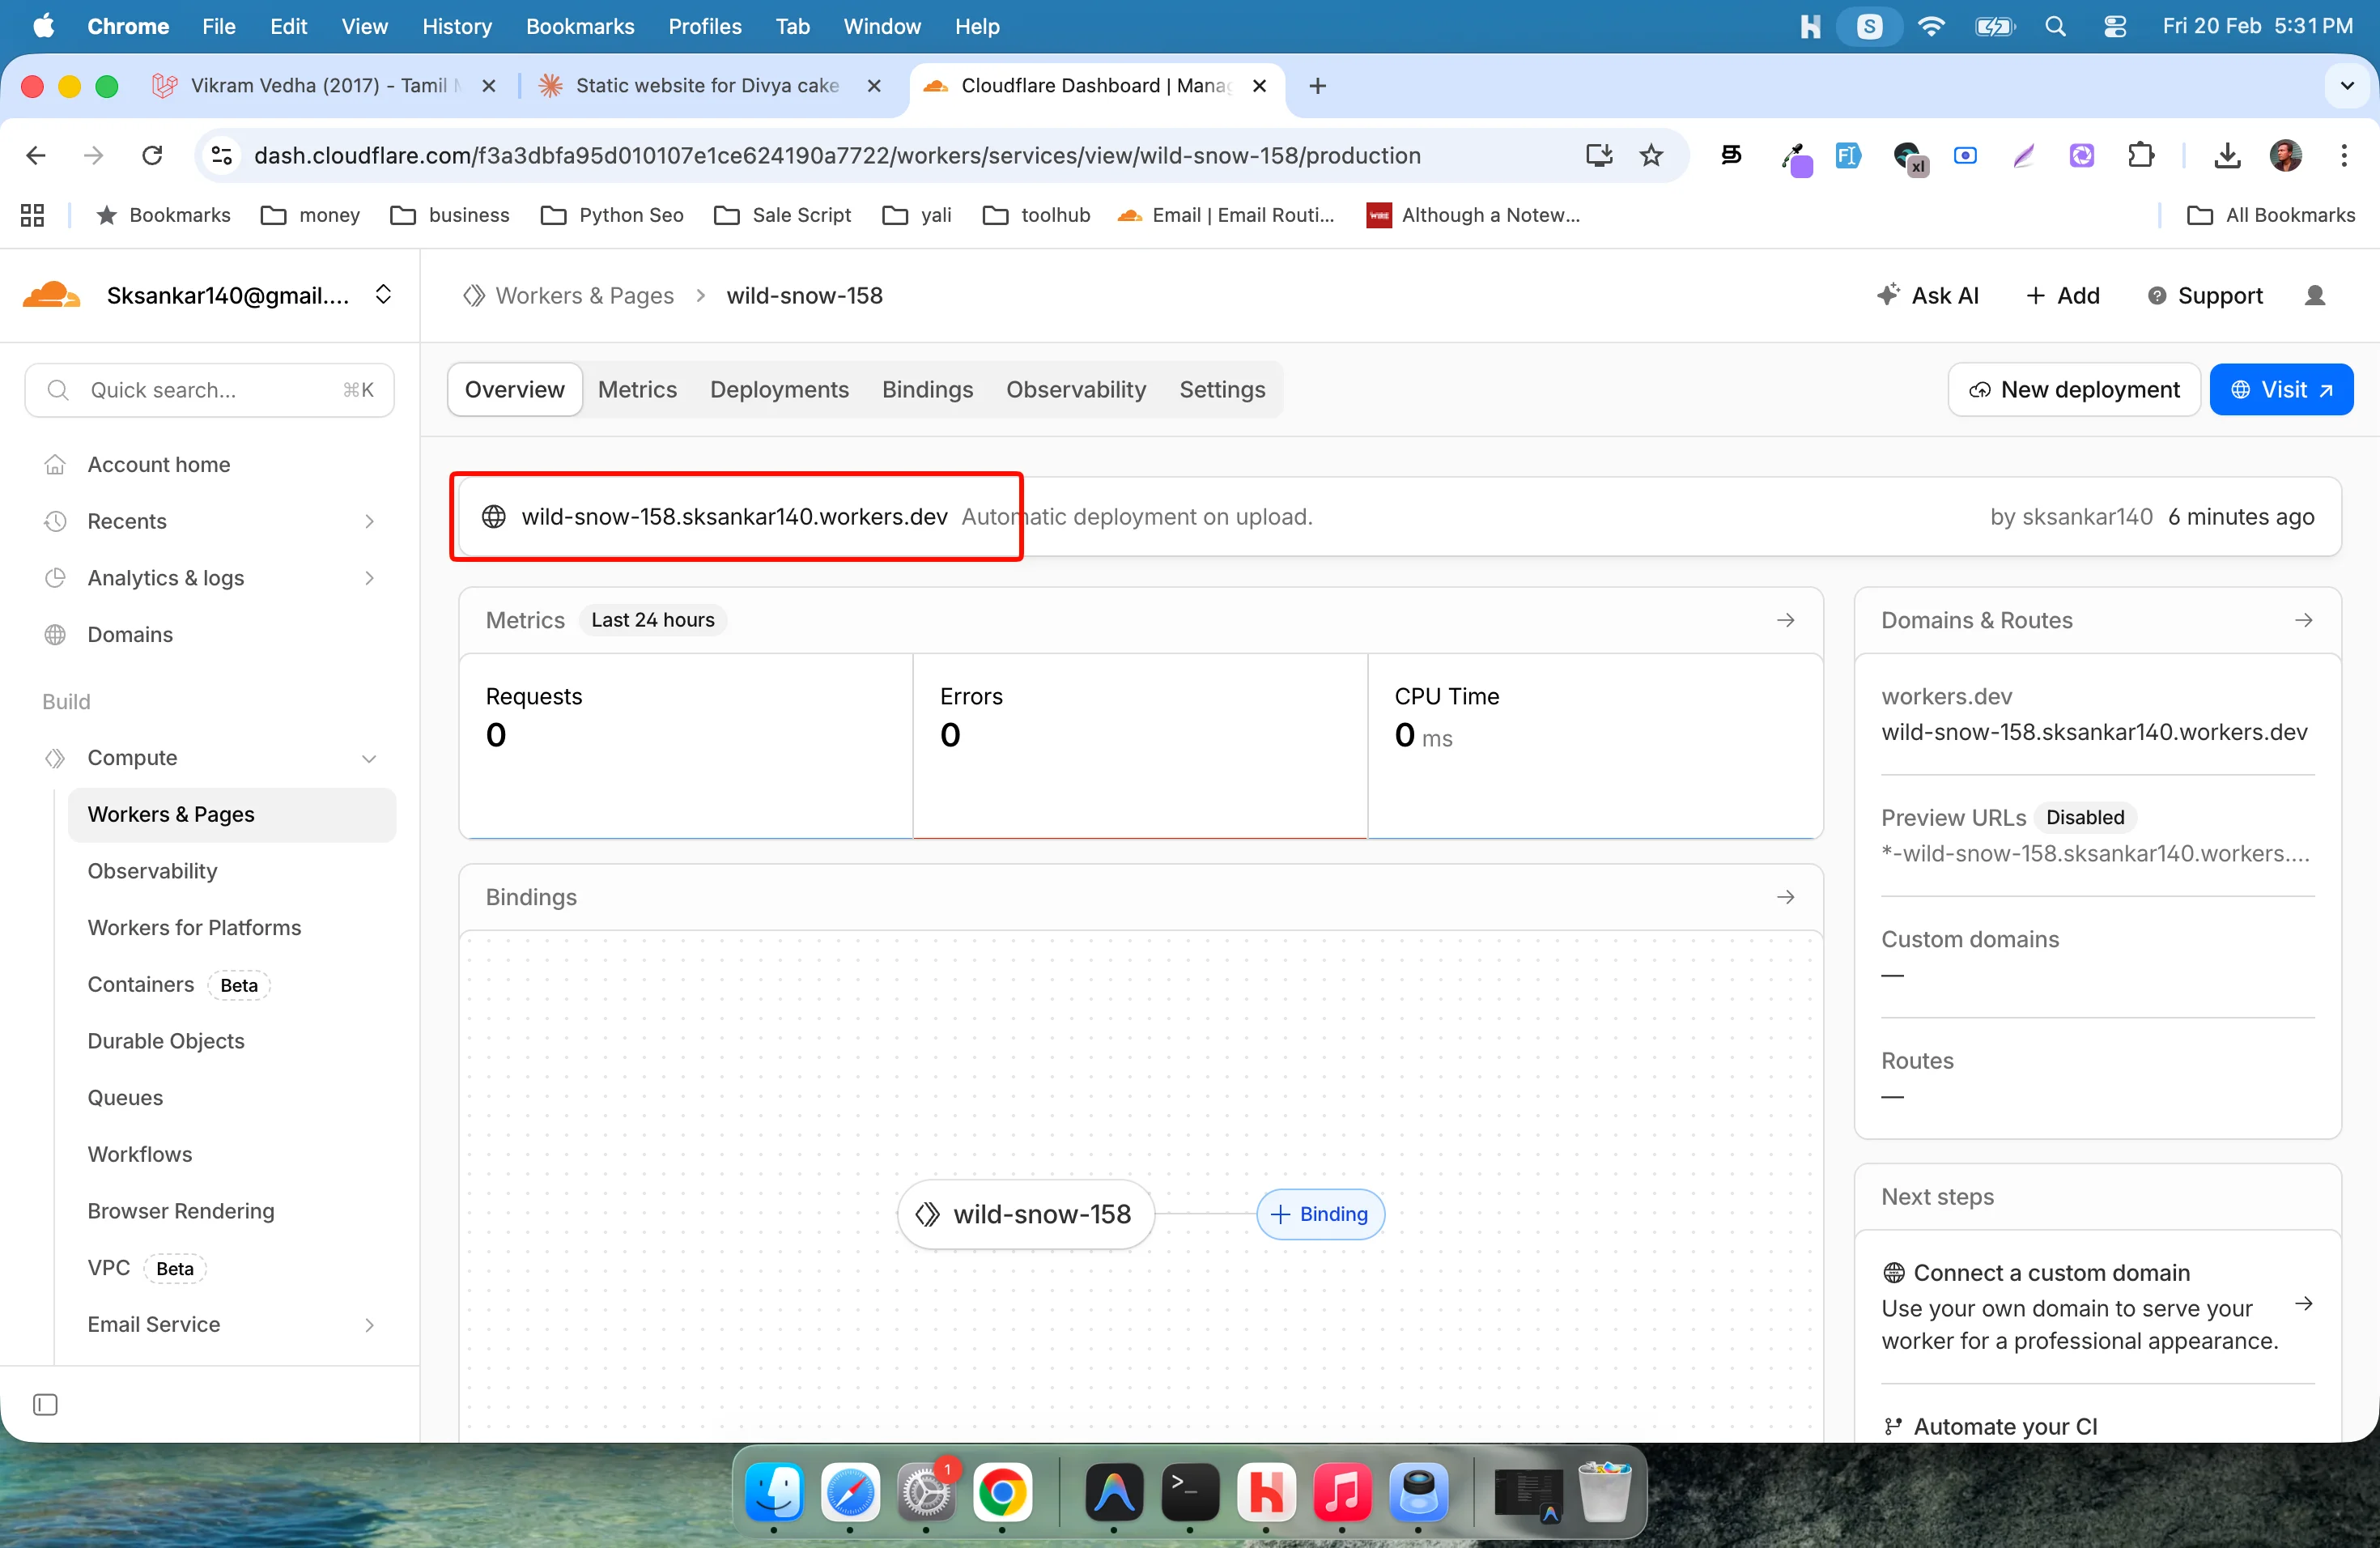
Step 9: Open Your Live Website URL
After deployment, Cloudflare will show a success page.
Your website will be deployed with a custom subdomain based on your username.
Click the provided link to open your live website.
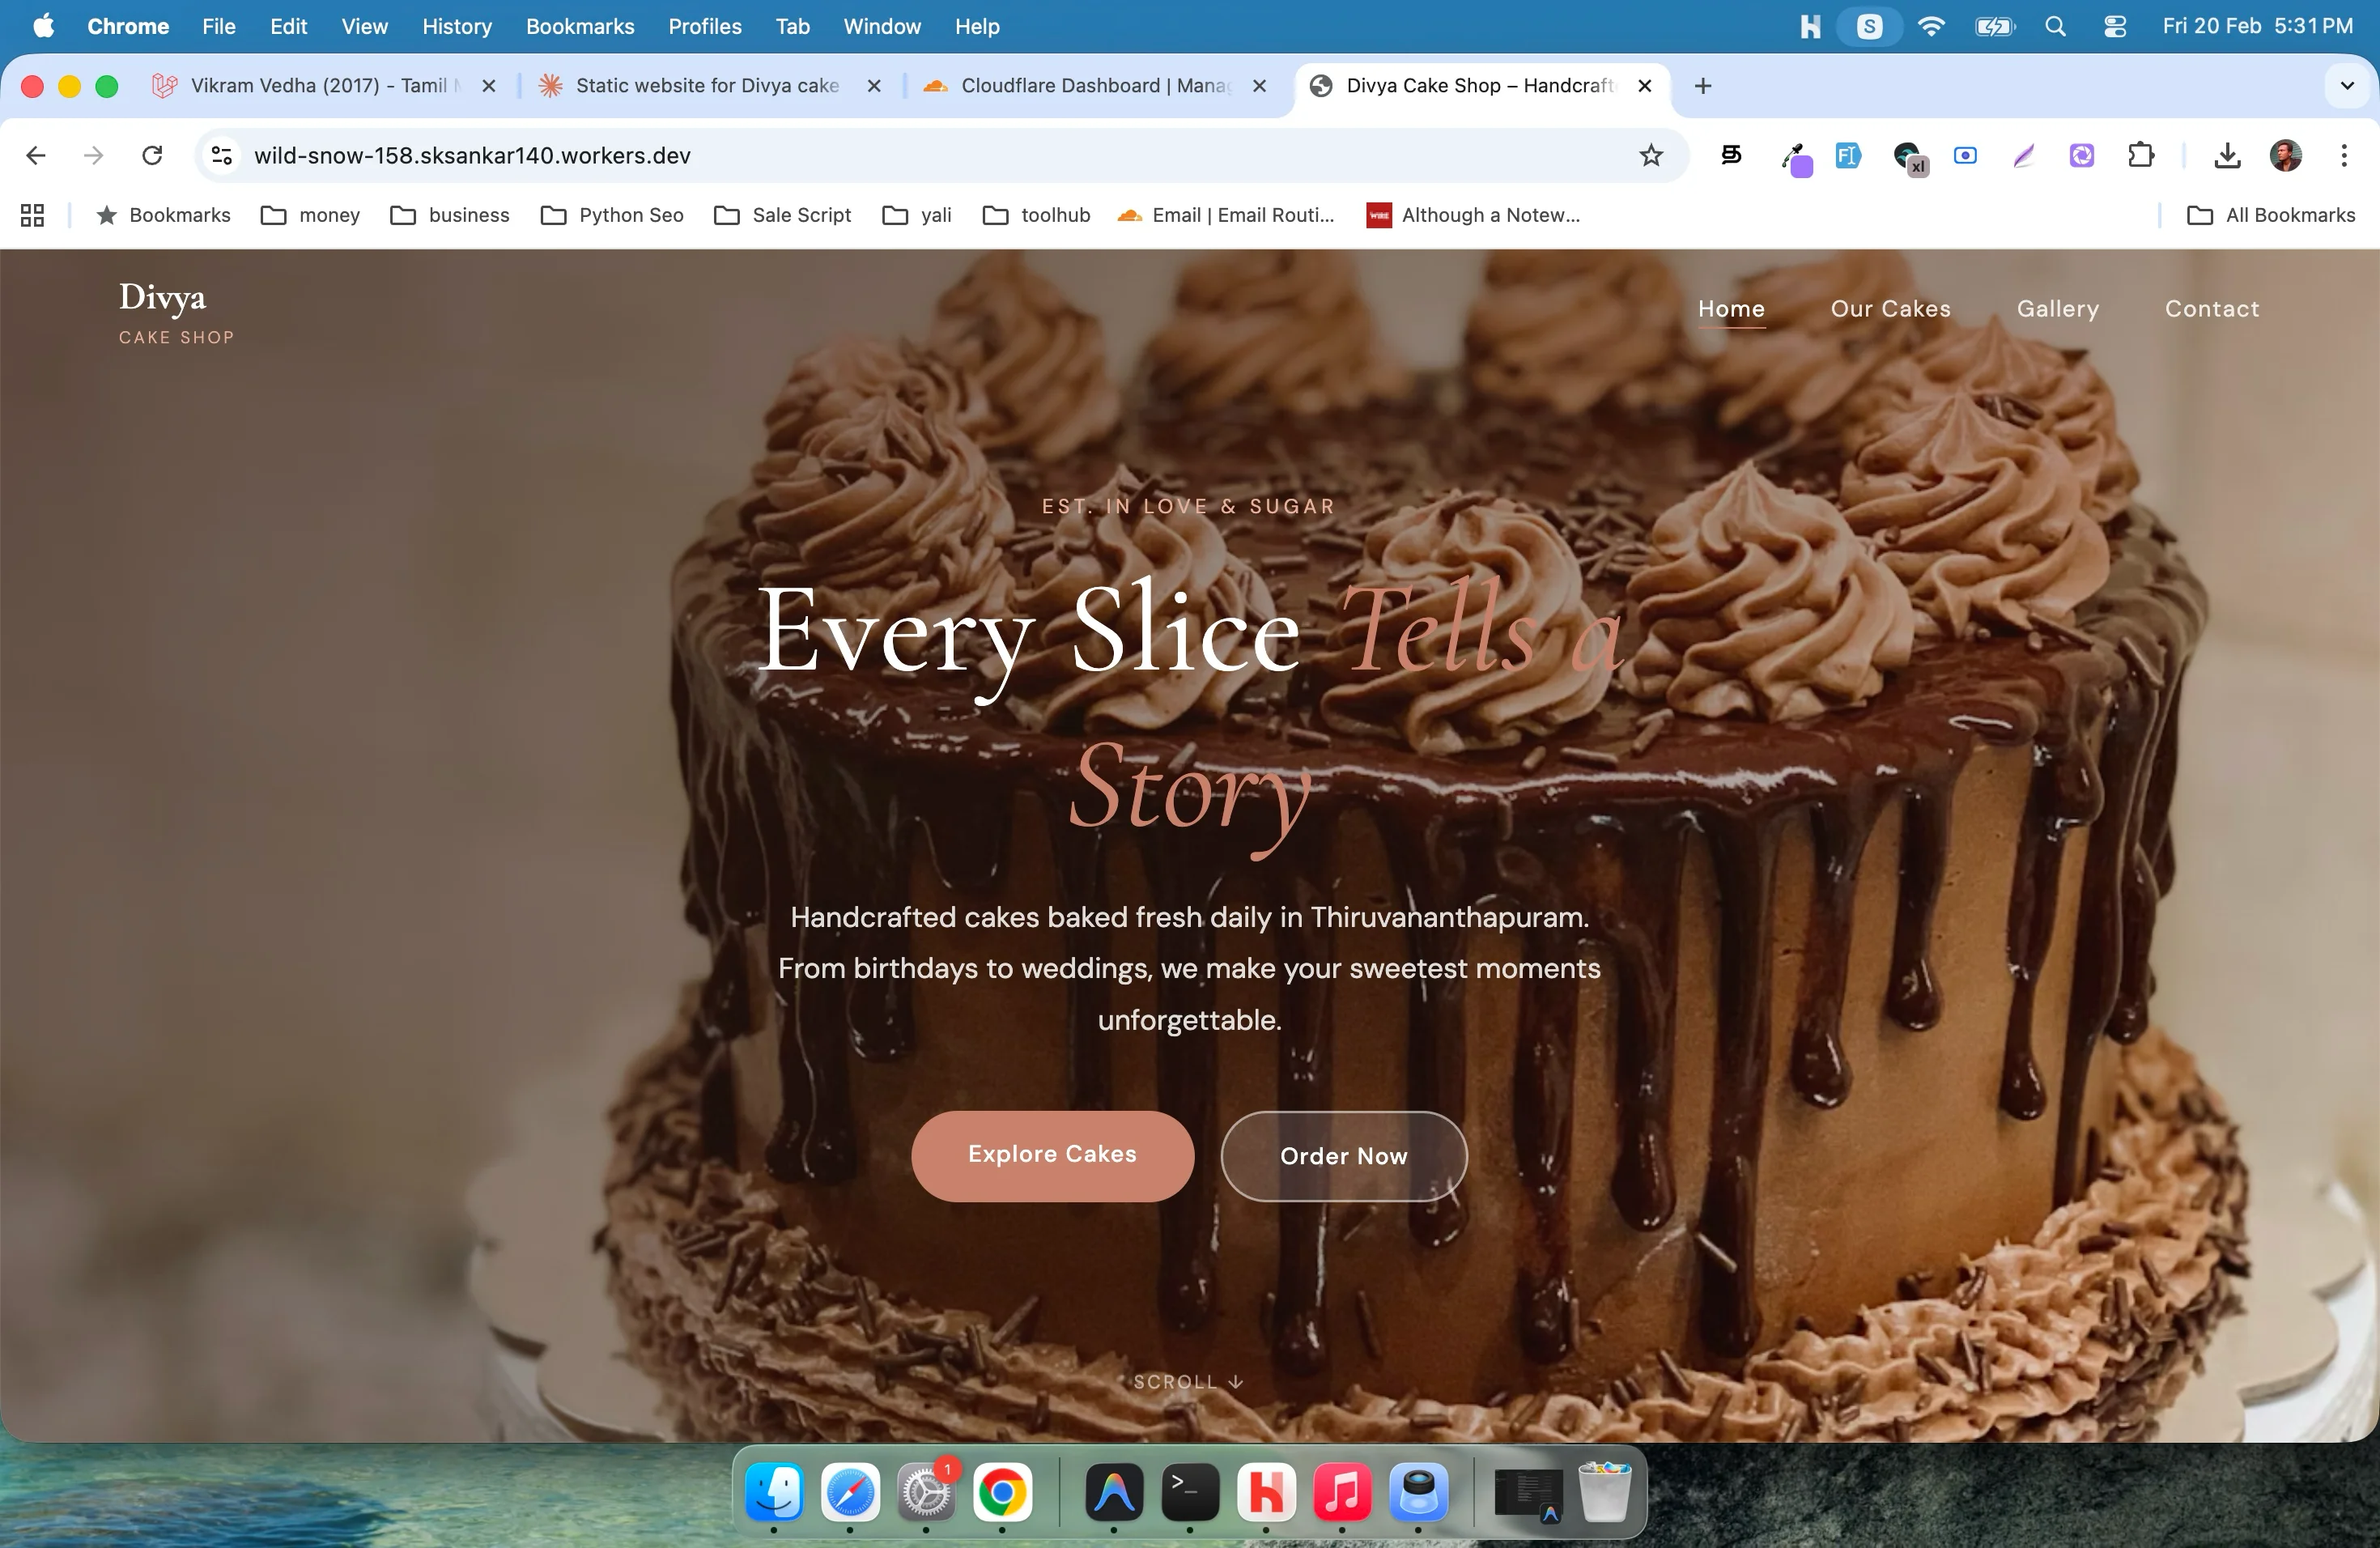
Step 10: View Your Website Live
Now you can view your website live and see how it looks to your customers.
Test:
- Navigation links
- Contact form
- Images
- Mobile responsiveness
Congratulations! Your website is now hosted for free.
See what i create during this article create: https://wild-snow-158.sksankar140.workers.dev
Step 11: Get Help If You Need Custom Setup
That’s all!
If you need help with:
- Custom domain setup
- Design changes
- SEO improvements
- Performance optimization
You can comment below, and I can help you.
FAQ
Is Claude AI free to use for website creation?
Yes, Claude offers a free plan that allows you to generate website code. You can create static websites without paying anything.
Is Cloudflare Pages really free?
Yes, Cloudflare Pages provides a generous free tier for hosting static websites with global CDN support.
Can I connect a custom domain to my website?
Yes, you can connect your own domain inside the Cloudflare dashboard after deployment.
Do I need coding knowledge to use this method?
No. You only need to enter a prompt. Claude generates the website code for you.
Is this method good for small businesses?
Absolutely. This method is perfect for local businesses, portfolios, startups, and personal websites.
Conclusion
You’ve just learned how to create and host a website for free using Claude AI and Cloudflare Pages in 2026.
With AI-powered website generation and free cloud hosting, launching a professional website is easier than ever. You don’t need technical skills, expensive hosting, or complex setup.
Now it’s your turn — create your website, deploy it, and take your business online today 🚀
Related Posts

Whiteboard Animation Generator with Python: A Complete Step-by-Step Guide
21 min · 434 views

How to Get a Free GLM-5 API Key and Use It for Coding Projects (2026)
4 min · 3,589 views

How Can You Convert Large Images to Other Formats? Easy Step-by-Step Guide
10 min · 512 views

💬 Comments (3)
Leave a Comment