
Whiteboard Animation Generator with Python: A Complete Step-by-Step Guide

Whiteboard animation videos are one of the best ways to explain ideas, create educational content, and improve engagement on platforms like YouTube, Instagram, Facebook, and TikTok. However, many whiteboard animation tools can be expensive or difficult to use for beginners.
In this guide, you'll learn an easy method to create high-quality whiteboard animations using Python. Instead of relying on costly software, you can generate smooth drawing animations directly from images using a simple Python script.
By the end of this tutorial, you’ll know how to generate whiteboard-style images, install the required tools, run the animation script, and customize your output video for different use cases.
Create Whiteboard-Style Images
The first step is creating clean whiteboard-style illustrations. You can generate these images using tools like ChatGPT, Midjourney, Gemini, or any other AI image generator.
To get the best results, make sure your images have:
- Clean black outlines
- Flat solid colors
- No shadows
- No gradients
- White background
Use a prompt similar to the one below:
Whiteboard animation style illustration on pure white background. Tamil culture educational poster. Hand-drawn doodle art with thick black outlines. Simple flat color fills — each element one solid color, no blending. Include: Tamil script, temple, classical dancer, kolam, traditional food, literature books. Sections clearly labeled in English and Tamil. Style: children's educational book illustration. High contrast black outlines, flat colors, zero gradients, zero drop shadows.
💡 Tip: Whiteboard animations work best with simple illustrations and strong outlines. Avoid realistic images with shadows or blurry details.

Install Python and Set Up the Project Folder
First, install Python on your computer if you do not already have it installed.
Next:
- Create a new folder anywhere on your computer.
- Create two files inside the folder:
animate.pyrequirements.txt
- Copy the provided Python script into
animate.py - Copy the dependency list into
requirements.txt
After creating the files, open a terminal or command prompt and navigate to the project folder.
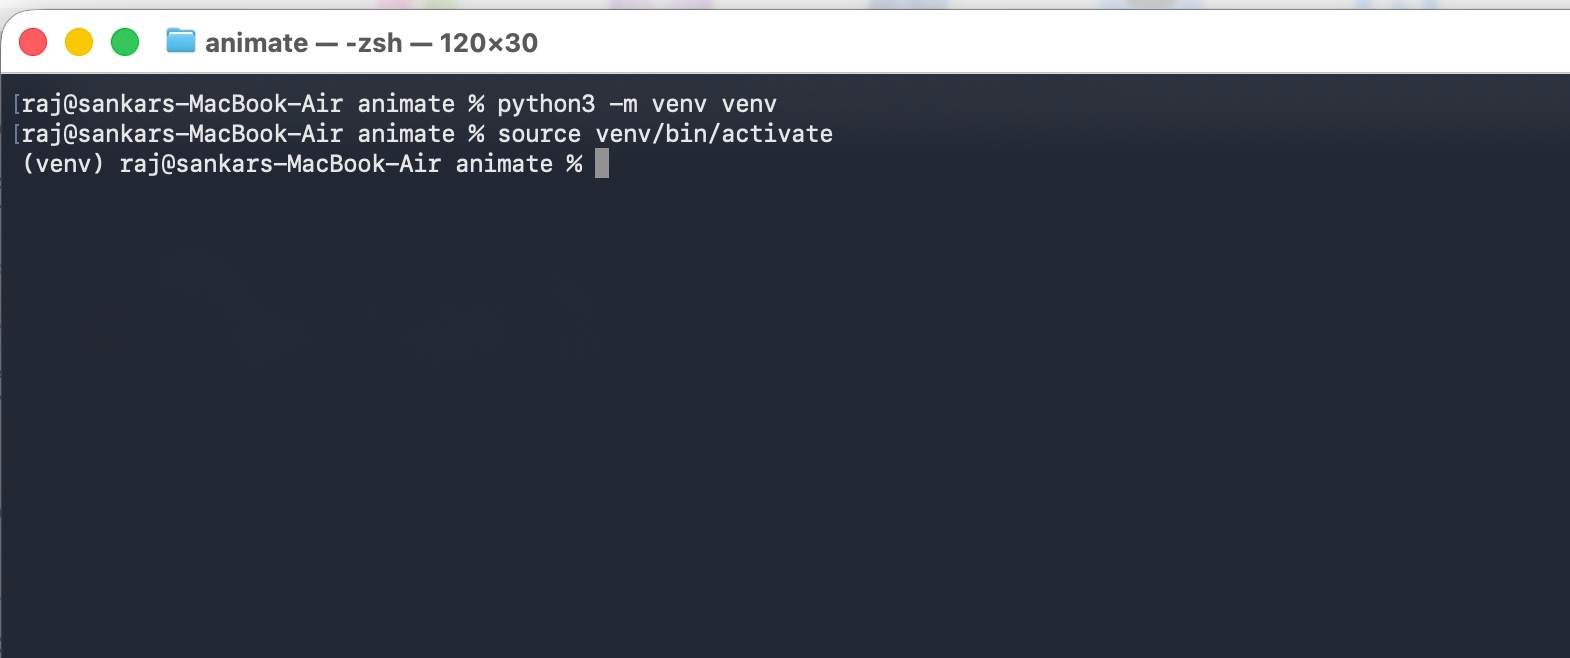
Then create a Python virtual environment using the commands below:
# Create the virtual environment
python3 -m venv venv

# Activate the virtual environment

# macOS/Linux:
source venv/bin/activate

# Windows:
# venv\Scripts\activate
💡 Tip: Using a virtual environment helps keep your project dependencies isolated from other Python projects.
Install the Required Python Libraries
Now install the required external libraries:
opencv-pythonPillownumpy
Run this command:
pip install -r requirements.txt
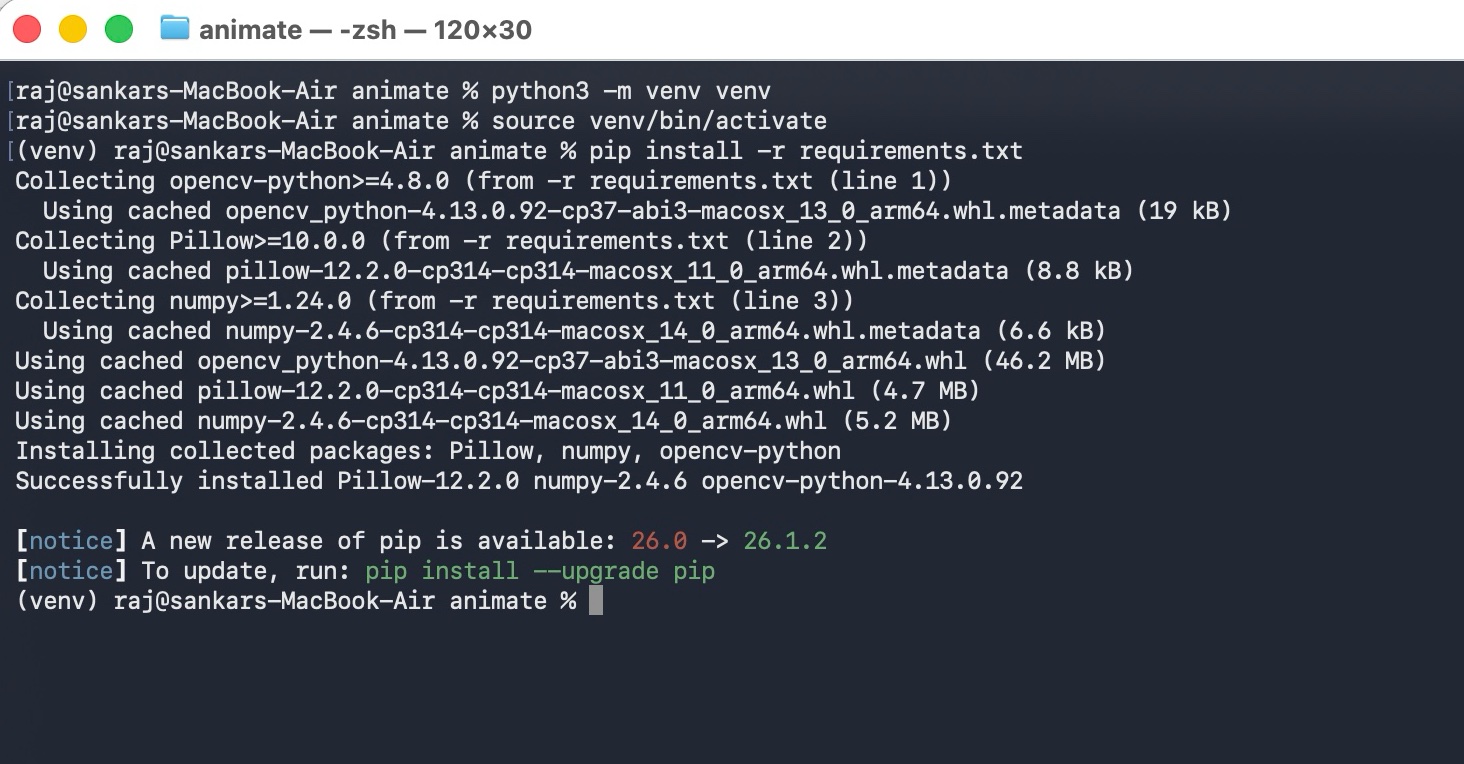
Alternatively, you can install the libraries manually:
pip install opencv-python Pillow numpy
[!NOTE] Make sure
ffmpegis installed on your system because it is required to generate the final MP4 video.
- macOS:
brew install ffmpeg- Ubuntu/Debian:
sudo apt-get install ffmpeg
Run the Whiteboard Animation Script
After installing all dependencies, you can execute the animation script.
Use the following command:
python animate.py -i "your-ai-generated-image.png"
The script will automatically:
- Detect image outlines
- Segment visual objects
- Animate drawing strokes
- Add coloring effects
- Generate a smooth MP4 video
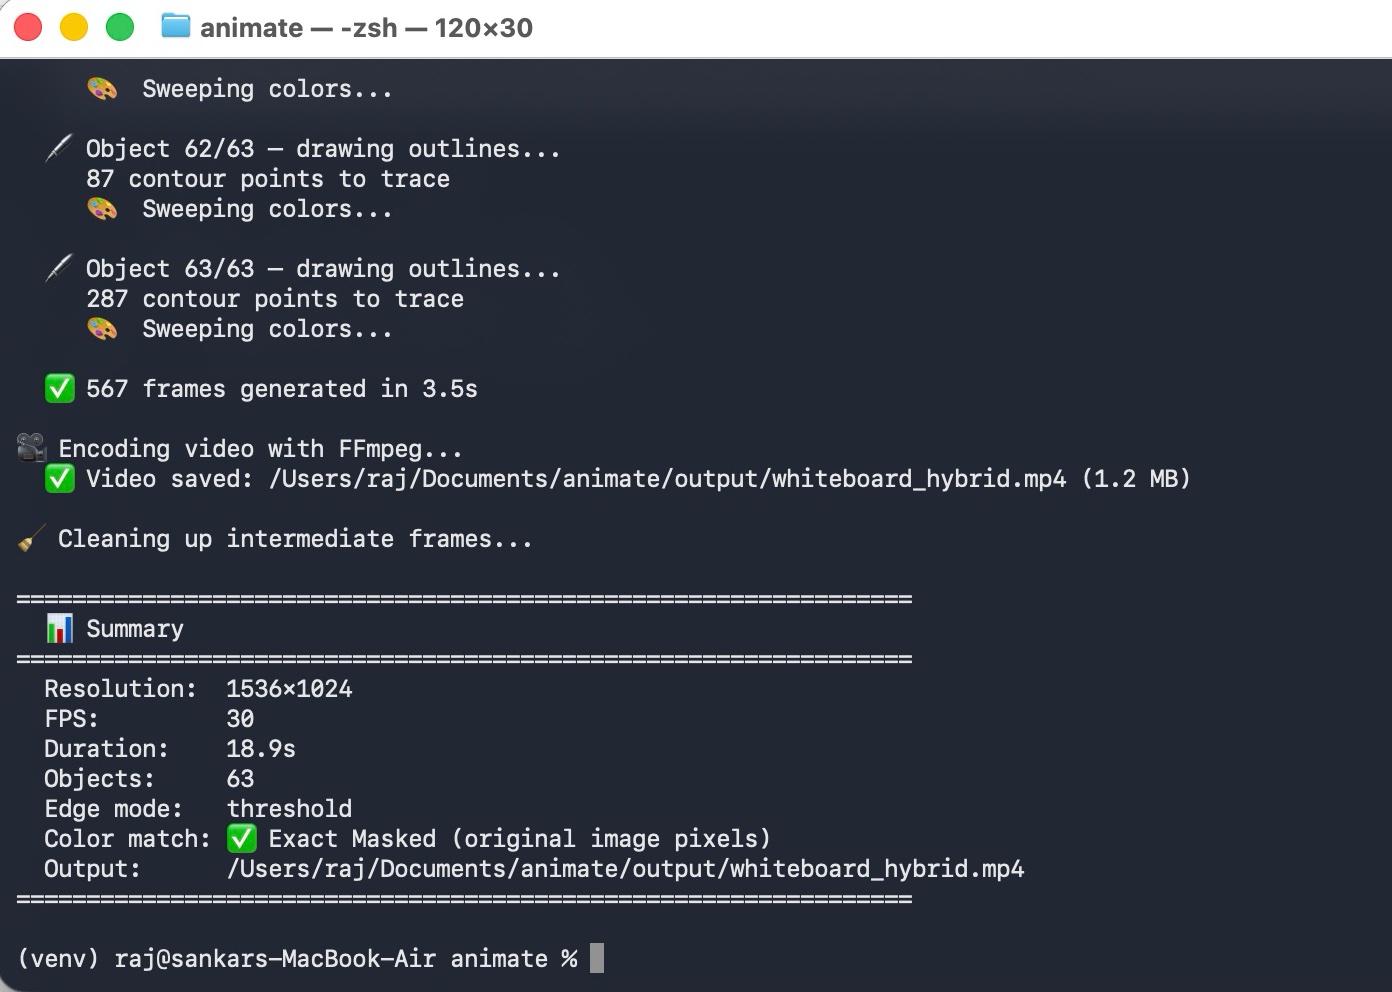
Thats all your whiteboard animation generated
In your project folder new output created open it and see generated video example ouput below.
Customize the Animation Settings (Optional)
You can customize the animation output using several command-line options.
Specify a Custom Output File
python animate.py -i "your-ai-generated-image.png" -o "output/custom_name.mp4"
Adjust Animation Duration and FPS
python animate.py -i "your-ai-generated-image.png" --duration 15 --fps 30
Change the Edge Detection Mode
python animate.py -i "your-ai-generated-image.png" --edge-mode adaptive
Available edge detection modes:
cannythresholdadaptive
💡 Tip: The
thresholdmode usually works best for cartoon-style illustrations and doodle art.
Disable the Drawing Pen Cursor
python animate.py -i "your-ai-generated-image.png" --no-cursor
Full Python Script
Below is the complete animate.py script used to generate the whiteboard animations.
#!/usr/bin/env python3
"""
  Usage:
    python animate.py -i "../ChatGPT Image May 28, 2026, 10_53_01 AM.png"
    python animate.py -i "../image.png" --duration 20 --fps 30

  Requirements:
    pip install opencv-python Pillow numpy
    brew install ffmpeg
═══════════════════════════════════════════════════════════════════════
"""

import argparse
import os
import shutil
import subprocess
import sys
import time
import math

try:
    import numpy as np
except ImportError:
    print("❌ numpy is required. Install with: pip install numpy")
    sys.exit(1)

try:
    import cv2
except ImportError:
    print("❌ OpenCV is required. Install with: pip install opencv-python")
    sys.exit(1)


# ═══════════════════════════════════════════════════════════════════
#  Line Thickness Estimation
# ═══════════════════════════════════════════════════════════════════

def estimate_line_thickness(image_bgr):
    """
    Estimate the outline line thickness of the image using a distance transform.
    Runs an adaptive threshold to isolate local lines/details, restricts to the
    foreground, and calculates the median distance to background for line centers.
    """
    gray = cv2.cvtColor(image_bgr, cv2.COLOR_BGR2GRAY)

    # Run adaptive threshold to get binary edges
    edges = cv2.adaptiveThreshold(
        gray, 255, cv2.ADAPTIVE_THRESH_GAUSSIAN_C,
        cv2.THRESH_BINARY_INV, 11, 4
    )

    # Restrict to actual dark lines (foreground)
    _, fg_mask = cv2.threshold(gray, 240, 255, cv2.THRESH_BINARY_INV)
    edges = cv2.bitwise_and(edges, fg_mask)

    # L2 Distance transform on the edge map
    dist = cv2.distanceTransform(edges, cv2.DIST_L2, 5)

    # Dilate distance transform to find local maxima (centers of line strokes)
    kernel = np.ones((3, 3), dtype=np.uint8)
    dilated = cv2.dilate(dist, kernel)
    local_max = (dist == dilated) & (edges > 0)

    center_dists = dist[local_max]
    if len(center_dists) > 0:
        median_dist = np.percentile(center_dists, 50)
        # median_dist is the half-width of the line.
        # Round it to the nearest integer to use as dilation thickness parameter.
        thickness = int(round(median_dist))
        return max(1, thickness)
    return 1


# ═══════════════════════════════════════════════════════════════════
#  Edge Detection Modes
# ═══════════════════════════════════════════════════════════════════

def detect_edges_canny(image_bgr, low=40, high=120, thickness=1):
    """Canny edge detection — good for photos and complex images."""
    gray = cv2.cvtColor(image_bgr, cv2.COLOR_BGR2GRAY)
    blurred = cv2.GaussianBlur(gray, (3, 3), 0)
    edges = cv2.Canny(blurred, low, high)
    if thickness > 1:
        kernel = np.ones((thickness, thickness), np.uint8)
        edges = cv2.dilate(edges, kernel, iterations=1)
    return edges


def detect_edges_threshold(image_bgr, threshold=210, thickness=1):
    """Threshold-based — ideal for illustrations with clear dark outlines."""
    gray = cv2.cvtColor(image_bgr, cv2.COLOR_BGR2GRAY)
    _, edges = cv2.threshold(gray, threshold, 255, cv2.THRESH_BINARY_INV)
    kernel_open = np.ones((2, 2), np.uint8)
    edges = cv2.morphologyEx(edges, cv2.MORPH_OPEN, kernel_open)
    if thickness > 1:
        kernel = np.ones((thickness, thickness), np.uint8)
        edges = cv2.dilate(edges, kernel, iterations=1)
    return edges


def detect_edges_adaptive(image_bgr, thickness=1):
    """Adaptive threshold — handles varying contrast well."""
    gray = cv2.cvtColor(image_bgr, cv2.COLOR_BGR2GRAY)
    blurred = cv2.GaussianBlur(gray, (5, 5), 0)
    edges = cv2.adaptiveThreshold(
        blurred, 255, cv2.ADAPTIVE_THRESH_GAUSSIAN_C,
        cv2.THRESH_BINARY_INV, 11, 4,
    )
    kernel = np.ones((2, 2), np.uint8)
    edges = cv2.morphologyEx(edges, cv2.MORPH_OPEN, kernel)
    if thickness > 1:
        kernel_d = np.ones((thickness, thickness), np.uint8)
        edges = cv2.dilate(edges, kernel_d, iterations=1)
    return edges


# ═══════════════════════════════════════════════════════════════════
#  Object Segmentation via Connected Components
# ═══════════════════════════════════════════════════════════════════

def segment_objects(image_bgr, min_area=150, dilation_ksize=11):
    """
    Detect distinct visual elements using connected components.
    Dilates the foreground mask to group small close details, then merges
    smaller components into the nearest large component.
    """
    h, w = image_bgr.shape[:2]
    gray = cv2.cvtColor(image_bgr, cv2.COLOR_BGR2GRAY)

    # Foreground mask: anything that is not near-white (background)
    _, fg_mask = cv2.threshold(gray, 240, 255, cv2.THRESH_BINARY_INV)

    # Clean foreground mask noise
    kernel_open = cv2.getStructuringElement(cv2.MORPH_ELLIPSE, (3, 3))
    fg_mask = cv2.morphologyEx(fg_mask, cv2.MORPH_OPEN, kernel_open)

    # Dilate mask to merge nearby elements (letters, details of characters)
    dilate_kernel = cv2.getStructuringElement(cv2.MORPH_ELLIPSE, (dilation_ksize, dilation_ksize))
    dilated_mask = cv2.dilate(fg_mask, dilate_kernel)

    # Label connected components
    num_labels, labels, stats, centroids = cv2.connectedComponentsWithStats(dilated_mask)

    # Separate large and small components (0 is background)
    large_labels = []
    small_labels = []

    for i in range(1, num_labels):
        area = stats[i, cv2.CC_STAT_AREA]
        if area >= min_area:
            large_labels.append(i)
        else:
            small_labels.append(i)

    # Fallback if no large components found
    if not large_labels:
        large_labels = list(range(1, num_labels))
        small_labels = []

    # Copy labels map to refine
    refined_labels = labels.copy()

    # Merge small labels into closest large labels by centroid distance
    for s_label in small_labels:
        s_centroid = centroids[s_label]
        if np.isnan(s_centroid[0]) or np.isnan(s_centroid[1]):
            continue

        best_l_label = large_labels[0]
        min_dist = float('inf')
        for l_label in large_labels:
            l_centroid = centroids[l_label]
            if np.isnan(l_centroid[0]) or np.isnan(l_centroid[1]):
                continue
            dist = np.linalg.norm(np.array(l_centroid) - np.array(s_centroid))
            if dist < min_dist:
                min_dist = dist
                best_l_label = l_label

        refined_labels[labels == s_label] = best_l_label

    # Build objects dictionary list
    objects = []
    for l_label in large_labels:
        # Mask of this object is intersection of its dilated label & original fg_mask
        obj_mask = (refined_labels == l_label) & (fg_mask > 0)
        pixel_count = np.sum(obj_mask)
        if pixel_count < 10:
            continue

        # Get exact bounding box
        pts = cv2.findNonZero(obj_mask.astype(np.uint8))
        if pts is None:
            continue
        x, y, bw, bh = cv2.boundingRect(pts)
        cx, cy = x + bw // 2, y + bh // 2

        objects.append({
            'id': l_label,
            'mask': obj_mask,
            'bbox': (x, y, bw, bh),
            'center': (cx, cy),
            'area': pixel_count
        })

    return objects


# ═══════════════════════════════════════════════════════════════════
#  Nearest-Neighbor Ordering (TSP solver)
# ═══════════════════════════════════════════════════════════════════

def sort_objects_tsp(objects, start_pos):
    """Sort objects in nearest-neighbor order starting from start_pos."""
    ordered = []
    remaining = list(objects)
    cur = np.array(start_pos)

    while remaining:
        bi, bd = 0, float('inf')
        for idx, obj in enumerate(remaining):
            d = np.linalg.norm(np.array(obj['center']) - cur)
            if d < bd:
                bd = d
                bi = idx
        obj = remaining.pop(bi)
        ordered.append(obj)
        cur = np.array(obj['center'])

    return ordered


def build_object_drawing_sequence(edges, obj_mask, start_pen_pos):
    """
    Extract edges inside the object mask, find contours, and order them using
    nearest-neighbor TSP starting from start_pen_pos.
    """
    # Restrict edges to object mask
    obj_edges = cv2.bitwise_and(edges, edges, mask=obj_mask.astype(np.uint8))

    # Find contours
    contours, _ = cv2.findContours(obj_edges, cv2.RETR_LIST, cv2.CHAIN_APPROX_NONE)

    # Filter tiny contours
    contours = [c for c in contours if len(c) > 6]
    if not contours:
        return [], start_pen_pos

    ordered_contours = []
    remaining = list(range(len(contours)))
    cur_pos = np.array(start_pen_pos)

    while remaining:
        bi = 0
        bd = float('inf')
        # Find closest contour starting point
        for idx, ci in enumerate(remaining):
            cnt = contours[ci]
            first_pt = cnt[0][0]
            d = np.linalg.norm(first_pt - cur_pos)
            if d < bd:
                bd = d
                bi = idx

        ci = remaining.pop(bi)
        cnt = contours[ci]

        # Bidirectional check: reverse contour if its end point is closer
        first_pt = cnt[0][0]
        last_pt = cnt[-1][0]
        d_normal = np.linalg.norm(first_pt - cur_pos)
        d_reverse = np.linalg.norm(last_pt - cur_pos)

        if d_reverse < d_normal:
            cnt = cnt[::-1]

        ordered_contours.append(cnt)
        cur_pos = cnt[-1][0]

    # Flatten contours into (x, y, is_new_contour) points
    pts = []
    for cnt in ordered_contours:
        for j, p in enumerate(cnt):
            gx, gy = int(p[0][0]), int(p[0][1])
            is_new = (j == 0)
            pts.append((gx, gy, is_new))

    return pts, (int(cur_pos[0]), int(cur_pos[1]))


# ═══════════════════════════════════════════════════════════════════
#  Slanted Marker Cursor
# ═══════════════════════════════════════════════════════════════════

def draw_pen_cursor(frame_bgr, px, py, pen_color=(40, 40, 40)):
    """Draw a realistic, 3D-slanted whiteboard marker pointing to (px, py)."""
    result = frame_bgr.copy()
    px, py = int(px), int(py)
    h, w = result.shape[:2]

    px = max(2, min(w - 2, px))
    py = max(2, min(h - 2, py))

    # Angle of slant: 45 degrees pointing down-left
    angle = np.pi / 4
    length = 55
    dx = int(length * np.cos(angle))
    dy = int(length * np.sin(angle))

    tx = px + dx
    ty = py - dy

    # 1. Shadow under marker body
    shadow_offset = 3
    cv2.line(result, (px + shadow_offset, py + shadow_offset),
             (tx + shadow_offset, ty - shadow_offset), (205, 205, 205), 10, cv2.LINE_AA)

    # 2. Marker body (thick cylinder)
    cv2.line(result, (px, py), (tx, ty), (235, 235, 235), 8, cv2.LINE_AA)

    # 3. Color cap/collar near the tip
    collar_len = 12
    cx = px + int(collar_len * np.cos(angle))
    cy = py - int(collar_len * np.sin(angle))
    cv2.line(result, (px, py), (cx, cy), pen_color, 8, cv2.LINE_AA)

    # 4. Marker felt tip
    tip_len = 3
    tx2 = px + int(tip_len * np.cos(angle))
    ty2 = py - int(tip_len * np.sin(angle))
    cv2.line(result, (px, py), (tx2, ty2), (30, 30, 30), 4, cv2.LINE_AA)

    return result


# ═══════════════════════════════════════════════════════════════════
#  Animation Stages
# ═══════════════════════════════════════════════════════════════════

def animate_outline(canvas, drawing_seq, frames_dir, frame_idx,
                    fps, duration_sec, show_cursor=True, pen_color=(30, 30, 30), line_thickness=1):
    """Animate drawing outlines contour-by-contour."""
    if not drawing_seq:
        return frame_idx

    total_frames = max(1, int(fps * duration_sec))
    total_points = len(drawing_seq)
    points_per_frame = max(1, total_points // total_frames)

    drawn_up_to = 0
    last_cursor = (drawing_seq[0][0], drawing_seq[0][1])

    for f in range(total_frames):
        target = min(total_points, (f + 1) * points_per_frame)

        for i in range(drawn_up_to, target):
            gx, gy, is_new = drawing_seq[i]

            if not is_new and i > 0:
                prev_gx, prev_gy, _ = drawing_seq[i - 1]
                cv2.line(canvas, (prev_gx, prev_gy), (gx, gy),
                         pen_color, line_thickness, cv2.LINE_AA)
            else:
                cv2.circle(canvas, (gx, gy), line_thickness, pen_color, -1)

            last_cursor = (gx, gy)

        drawn_up_to = target

        if show_cursor:
            frame = draw_pen_cursor(canvas, last_cursor[0], last_cursor[1], pen_color)
        else:
            frame = canvas.copy()

        cv2.imwrite(
            os.path.join(frames_dir, f'frame_{frame_idx:05d}.jpg'),
            frame,
            [cv2.IMWRITE_JPEG_QUALITY, 92]
        )
        frame_idx += 1

    return frame_idx


def animate_color_fill(canvas, original, obj_mask, bbox, frames_dir, frame_idx,
                       fps, duration_sec, show_cursor=True, line_thickness=1):
    """
    Animate coloring inside the exact object label mask using a left-to-right sweep
    with a dynamically scribbling pen.
    """
    bx, by, bw, bh = bbox
    img_h, img_w = canvas.shape[:2]

    total_frames = max(1, int(fps * duration_sec))
    scribble_speed = 1.8

    last_cursor = (bx, by + bh // 2)

    # Dilate object mask to overwrite any outline spill-over on background with original white.
    # We dynamically scale the cleanup kernel size based on line thickness.
    clean_ksize = max(3, line_thickness * 2 - 1)
    if clean_ksize % 2 == 0:
        clean_ksize += 1
    clean_kernel = cv2.getStructuringElement(cv2.MORPH_RECT, (clean_ksize, clean_ksize))
    dilated_obj_mask = cv2.dilate(obj_mask.astype(np.uint8), clean_kernel).astype(bool)

    for f in range(total_frames):
        pct = (f + 1) / total_frames
        sweep_x = bx + int(bw * pct)
        sweep_x = min(sweep_x, img_w)

        # Build dilated mask to copy
        sweep_mask = dilated_obj_mask.copy()
        if sweep_x < img_w:
            sweep_mask[:, sweep_x:] = False

        # Copy original pixels (erases any Phase A residues with original background/line pixels)
        canvas[sweep_mask] = original[sweep_mask]

        curr_col_x = min(sweep_x, img_w - 1)
        active_ys = np.where(obj_mask[:, curr_col_x])[0]

        # Determine pen color dynamically based on image content
        sample_y = by + bh // 2
        if len(active_ys) > 0:
            sample_y = int(np.mean(active_ys))
        sample_bgr = original[min(sample_y, img_h - 1), curr_col_x]
        pen_color = (int(sample_bgr[0]), int(sample_bgr[1]), int(sample_bgr[2]))

        # Calculate scribbling y-coordinate
        if len(active_ys) > 0:
            ymin, ymax = active_ys[0], active_ys[-1]
            if ymax > ymin:
                cycle = (f * scribble_speed) % 2.0
                t = cycle if cycle <= 1.0 else 2.0 - cycle
                cy = int(ymin + (ymax - ymin) * t)
            else:
                cy = ymin
            last_cursor = (curr_col_x, cy)
        else:
            cy = by + bh // 2
            last_cursor = (curr_col_x, int(0.9 * last_cursor[1] + 0.1 * cy))

        if show_cursor:
            frame = draw_pen_cursor(canvas, last_cursor[0], last_cursor[1], pen_color)
        else:
            frame = canvas.copy()

        cv2.imwrite(
            os.path.join(frames_dir, f'frame_{frame_idx:05d}.jpg'),
            frame,
            [cv2.IMWRITE_JPEG_QUALITY, 92]
        )
        frame_idx += 1

    return frame_idx


def write_hold_frames(image_bgr, frames_dir, frame_idx, fps, duration_sec):
    """Write static pause frames."""
    n = max(1, int(fps * duration_sec))
    for i in range(n):
        cv2.imwrite(
            os.path.join(frames_dir, f'frame_{frame_idx + i:05d}.jpg'),
            image_bgr,
            [cv2.IMWRITE_JPEG_QUALITY, 92]
        )
    return frame_idx + n


# ═══════════════════════════════════════════════════════════════════
#  Full Animation Pipeline
# ═══════════════════════════════════════════════════════════════════

def generate_animation(original, edges, objects, frames_dir,
                       fps=30, duration=20.0, show_cursor=True, line_thickness=1,
                       intro_hold=0.0, outro_hold=0.0, pause_per_obj=0.0):
    """Animate outlines and color sweeps object by object."""
    h, w = original.shape[:2]
    num_objects = len(objects)

    # Scale holds and pauses down if they exceed the total requested duration
    total_non_anim = intro_hold + outro_hold + (pause_per_obj * num_objects)
    if total_non_anim >= duration:
        scale = (duration * 0.3) / max(0.01, total_non_anim)
        intro_hold *= scale
        outro_hold *= scale
        pause_per_obj *= scale

    anim_time = duration - intro_hold - outro_hold - (pause_per_obj * num_objects)
    anim_time = max(0.1, anim_time)

    # Distribute timing among objects based on edge counts
    edge_counts = []
    for obj in objects:
        obj_edges = cv2.bitwise_and(edges, edges, mask=obj['mask'].astype(np.uint8))
        edge_counts.append(max(1, np.sum(obj_edges > 0)))

    total_edge_px = sum(edge_counts)

    obj_times = [(ec / total_edge_px) * anim_time for ec in edge_counts]
    obj_times = [max(0.5, t) for t in obj_times]

    # Re-normalize to anim_time
    s_times = sum(obj_times)
    if s_times > 0:
        obj_times = [t * (anim_time / s_times) for t in obj_times]

    # Print timeline info
    print(f"\n⏱  Timeline ({num_objects} objects, {duration:.1f}s total):")
    for i, (obj, ot) in enumerate(zip(objects, obj_times)):
        x, y, bw, bh = obj['bbox']
        outline_t = ot * 0.60
        color_t = ot * 0.40
        print(f"  Object {i+1:2d}: {outline_t:.1f}s draw + {color_t:.1f}s color "
              f"— bbox({x},{y} {bw}×{bh}) — {edge_counts[i]:,} edge px")
    print(f"  + {intro_hold:.1f}s intro + {outro_hold:.1f}s outro "
          f"+ {pause_per_obj:.1f}s×{num_objects} pauses")

    # Start generation
    canvas = np.ones((h, w, 3), dtype=np.uint8) * 255
    frame_idx = 0

    # Intro
    frame_idx = write_hold_frames(canvas, frames_dir, frame_idx, fps, intro_hold)

    # Set initial pen position at the center of the canvas
    pen_pos = (w // 2, h // 2)

    for i, (obj, obj_time) in enumerate(zip(objects, obj_times)):
        outline_duration = obj_time * 0.60
        color_duration = obj_time * 0.40

        print(f"\n  🖊️  Object {i+1}/{num_objects} — drawing outlines...")
        seq, pen_pos = build_object_drawing_sequence(edges, obj['mask'], pen_pos)
        print(f"     {len(seq):,} contour points to trace")

        # Step A: Draw outlines
        frame_idx = animate_outline(
            canvas, seq, frames_dir, frame_idx,
            fps, outline_duration, show_cursor,
            pen_color=(30, 30, 30), line_thickness=line_thickness
        )

        print(f"     🎨  Sweeping colors...")
        # Step B: Masked color sweeps
        frame_idx = animate_color_fill(
            canvas, original, obj['mask'], obj['bbox'], frames_dir, frame_idx,
            fps, color_duration, show_cursor, line_thickness=line_thickness
        )

        # Brief pause between objects
        frame_idx = write_hold_frames(canvas, frames_dir, frame_idx, fps, pause_per_obj)

    # Outro final hold
    final = original.copy()
    frame_idx = write_hold_frames(final, frames_dir, frame_idx, fps, outro_hold)

    return frame_idx


# ═══════════════════════════════════════════════════════════════════
#  Video Encoding
# ═══════════════════════════════════════════════════════════════════

def encode_video(frames_dir, output_path, fps=30):
    """Encode JPEG frames to MP4 using FFmpeg."""
    if not shutil.which('ffmpeg'):
        print("\n⚠️  FFmpeg not found! Install with: brew install ffmpeg")
        print(f"   Frames at: {frames_dir}/")
        return False

    print(f"\n🎥 Encoding video with FFmpeg...")
    os.makedirs(os.path.dirname(output_path) or '.', exist_ok=True)

    cmd = [
        'ffmpeg', '-y',
        '-framerate', str(fps),
        '-i', os.path.join(frames_dir, 'frame_%05d.jpg'),
        '-c:v', 'libx264',
        '-pix_fmt', 'yuv420p',
        '-preset', 'medium',
        '-crf', '18',
        '-movflags', '+faststart',
        output_path,
    ]

    result = subprocess.run(cmd, capture_output=True, text=True)
    if result.returncode != 0:
        print(f"  ❌ FFmpeg error:\n{result.stderr[-500:]}")
        return False

    size_mb = os.path.getsize(output_path) / (1024 * 1024)
    print(f"  ✅ Video saved: {output_path} ({size_mb:.1f} MB)")
    return True


# ═══════════════════════════════════════════════════════════════════
#  Main Entrypoint
# ═══════════════════════════════════════════════════════════════════

def main():
    parser = argparse.ArgumentParser(
        description='Approach 3 v3: Masked-Object Whiteboard Animation',
        formatter_class=argparse.RawDescriptionHelpFormatter
    )
    parser.add_argument('--input', '-i', required=True,
                        help='Input image file (PNG/JPG)')
    parser.add_argument('--output', '-o', default='output/whiteboard_hybrid.mp4',
                        help='Output video path')
    parser.add_argument('--width', '-W', type=int, default=0,
                        help='Output width (0 = original)')
    parser.add_argument('--height', '-H', type=int, default=0,
                        help='Output height (0 = original)')
    parser.add_argument('--fps', type=int, default=30,
                        help='Frames per second (default: 30)')
    parser.add_argument('--duration', '-d', type=float, default=20.0,
                        help='Total animation duration in seconds (default: 20)')
    parser.add_argument('--edge-mode', choices=['canny', 'threshold', 'adaptive'],
                        default='threshold',
                        help='Edge detection method (default: threshold)')
    parser.add_argument('--edge-thickness', type=int, default=0,
                        help='Edge line thickness (0 = auto-detect, default: 0)')
    parser.add_argument('--dilation-ksize', type=int, default=11,
                        help='Dilation size to group component details (default: 11)')
    parser.add_argument('--min-area', type=int, default=150,
                        help='Min area in pixels to count component as distinct (default: 150)')
    parser.add_argument('--intro-hold', type=float, default=0.0,
                        help='Intro static hold duration in seconds (default: 0.0)')
    parser.add_argument('--outro-hold', type=float, default=0.0,
                        help='Outro static hold duration in seconds (default: 0.0)')
    parser.add_argument('--pause-per-obj', type=float, default=0.0,
                        help='Pause duration between objects in seconds (default: 0.0)')
    parser.add_argument('--no-cursor', action='store_true',
                        help='Disable pen cursor overlay')
    parser.add_argument('--keep-frames', action='store_true',
                        help='Keep intermediate JPEG frames after encoding')

    args = parser.parse_args()

    if not os.path.exists(args.input):
        print(f"❌ Input file not found: {args.input}")
        sys.exit(1)

    print("=" * 64)
    print("  ✏️  Approach 3 v3: Masked-Object Whiteboard Animation")
    print("=" * 64)

    # Load image
    print(f"\n📄 Loading: {os.path.basename(args.input)}")
    original = cv2.imread(args.input)
    if original is None:
        print(f"❌ Could not read image: {args.input}")
        sys.exit(1)

    h, w = original.shape[:2]
    print(f"  Original size: {w}×{h}")

    # Resize if needed
    if args.width > 0 and args.height > 0:
        original = cv2.resize(original, (args.width, args.height),
                              interpolation=cv2.INTER_LANCZOS4)
        h, w = original.shape[:2]
    elif args.width > 0:
        scale = args.width / w
        original = cv2.resize(original, (args.width, int(h * scale)),
                              interpolation=cv2.INTER_LANCZOS4)
        h, w = original.shape[:2]
    print(f"  Output size:   {w}×{h}")

    # Auto-detect edge thickness if set to 0
    if args.edge_thickness == 0:
        detected_thickness = estimate_line_thickness(original)
        print(f"  🔍 Auto-detected line thickness: {detected_thickness}")
        args.edge_thickness = detected_thickness

    # Edge detection
    print(f"\n🔍 Edge detection: {args.edge_mode}")
    if args.edge_mode == 'canny':
        edges = detect_edges_canny(original, thickness=args.edge_thickness)
    elif args.edge_mode == 'threshold':
        edges = detect_edges_threshold(original, thickness=args.edge_thickness)
    else:
        edges = detect_edges_adaptive(original, thickness=args.edge_thickness)

    # Restrict edges to foreground to avoid background outline lines
    gray = cv2.cvtColor(original, cv2.COLOR_BGR2GRAY)
    _, fg_mask = cv2.threshold(gray, 240, 255, cv2.THRESH_BINARY_INV)
    edges = cv2.bitwise_and(edges, fg_mask)

    edge_px = np.sum(edges > 0)
    print(f"  Edge pixels: {edge_px:,} ({edge_px / (h*w) * 100:.1f}%)")

    # Segment objects
    print(f"\n🧩 Segmenting visual objects...")
    objects = segment_objects(original, min_area=args.min_area, dilation_ksize=args.dilation_ksize)
    print(f"  Found {len(objects)} distinct visual objects after noise merging.")

    if not objects:
        print("⚠️ No objects found! Creating a fallback single object.")
        objects = [{
            'id': 1,
            'mask': fg_mask > 0,
            'bbox': (0, 0, w, h),
            'center': (w // 2, h // 2),
            'area': np.sum(fg_mask > 0)
        }]

    # TSP Sort the objects globally starting from center
    objects = sort_objects_tsp(objects, (w // 2, h // 2))

    # Generate frames
    script_dir = os.path.dirname(os.path.abspath(__file__))
    frames_dir = os.path.join(script_dir, 'frames')
    os.makedirs(frames_dir, exist_ok=True)

    print(f"\n🎬 Generating animation frames...")
    start_time = time.time()

    total_frames = generate_animation(
        original, edges, objects, frames_dir,
        fps=args.fps, duration=args.duration,
        show_cursor=not args.no_cursor,
        line_thickness=args.edge_thickness,
        intro_hold=args.intro_hold,
        outro_hold=args.outro_hold,
        pause_per_obj=args.pause_per_obj
    )

    gen_time = time.time() - start_time
    print(f"\n  ✅ {total_frames} frames generated in {gen_time:.1f}s")

    # Encode video
    output_path = args.output
    if not os.path.isabs(output_path):
        output_path = os.path.join(script_dir, output_path)

    encode_success = encode_video(frames_dir, output_path, fps=args.fps)

    # Cleanup frames
    if not args.keep_frames and os.path.exists(frames_dir):
        print(f"\n🧹 Cleaning up intermediate frames...")
        shutil.rmtree(frames_dir)

    # Final summary
    if encode_success:
        actual_duration = total_frames / args.fps
        print(f"\n{'=' * 64}")
        print(f"  📊 Summary")
        print(f"{'=' * 64}")
        print(f"  Resolution:  {w}×{h}")
        print(f"  FPS:         {args.fps}")
        print(f"  Duration:    {actual_duration:.1f}s")
        print(f"  Objects:     {len(objects)}")
        print(f"  Edge mode:   {args.edge_mode}")
        print(f"  Color match: ✅ Exact Masked (original image pixels)")
        print(f"  Output:      {output_path}")
        print(f"{'=' * 64}\n")


if __name__ == '__main__':
    main()
requirements.txt Content
opencv-python>=4.8.0
Pillow>=10.0.0
numpy>=1.24.0
FAQ
Do I need coding experience to use this method?
No. Basic computer knowledge is enough. Simply follow the setup steps and run the provided commands.
Can I use any image for whiteboard animation?
Yes, but images with clean black outlines, flat colors, and white backgrounds usually produce the best results.
Which platforms can I use these videos on?
You can upload the generated videos to YouTube, Instagram, Facebook, TikTok, educational platforms, and more.
Why is FFmpeg required?
FFmpeg is used to encode the generated image frames into a final MP4 video format.
Which edge detection mode is best?
For illustrations and AI-generated doodles, the threshold mode usually delivers the cleanest animation results.
Conclusion
You now know how to create professional whiteboard animations using Python without relying on expensive software. By combining AI-generated illustrations with OpenCV-based animation techniques, you can quickly create engaging educational videos, explainer content, and social media animations.
Experiment with different image styles, animation durations, and edge detection modes to create unique whiteboard videos that match your content style.
Related Posts

How to Create and Host a Website for Free Using Claude AI and Cloudflare Pages (2026 Guide)
6 min · 3,446 views

How to Get a Free GLM-5 API Key and Use It for Coding Projects (2026)
4 min · 3,654 views

How Can You Convert Large Images to Other Formats? Easy Step-by-Step Guide
10 min · 533 views

💬 Comments (0)
Leave a Comment
No comments yet. Be the first to comment!